
Atari 800 - Part 2

This second installation of the series will cover one way to perform in-circuit testing of the electrolytic capacitors of the Atari 800 (or any electronics circuit board) and how to connect the computer to an LCD monitor using the "MONITOR" port rather than the RF cable intended to be connected to the color television antenna connection.
Long Time No See
Apologies to my readers that are interested in the Atari 8 bit series. It's been over a year since I purchased my Atari 800, and since I published Part 1 of this series. Being busy with work, and spending most of my spare time tinkering and blogging about my Timex-Sinclair 1000 and my DIY 8 bit computer has kept me away from my Atari 800.
Before Power Up, Check The Caps!
Every time I read a blog post or watch a YouTube video of someone experienced getting their hands on a retro computer that has not been powered up for a long time, they either just systematically replace all of the electrolytic capacitors, or they will check them and replace them as needed. At the very least, it is advisable to open the case and inspect the circuit board/s for any bulging or leaking capacitors or batteries.
When I purchased my 800, I wanted to make sure that I didn't power it up before ensuring that all of the capacitors were in good order. I reached out to my good friend and electronics guru, Mario, and asked him what he uses to check capacitors when he is testing or repairing his pin ball machines. He told me about his go-to capacitor tester, the Capacitor WIZARD.
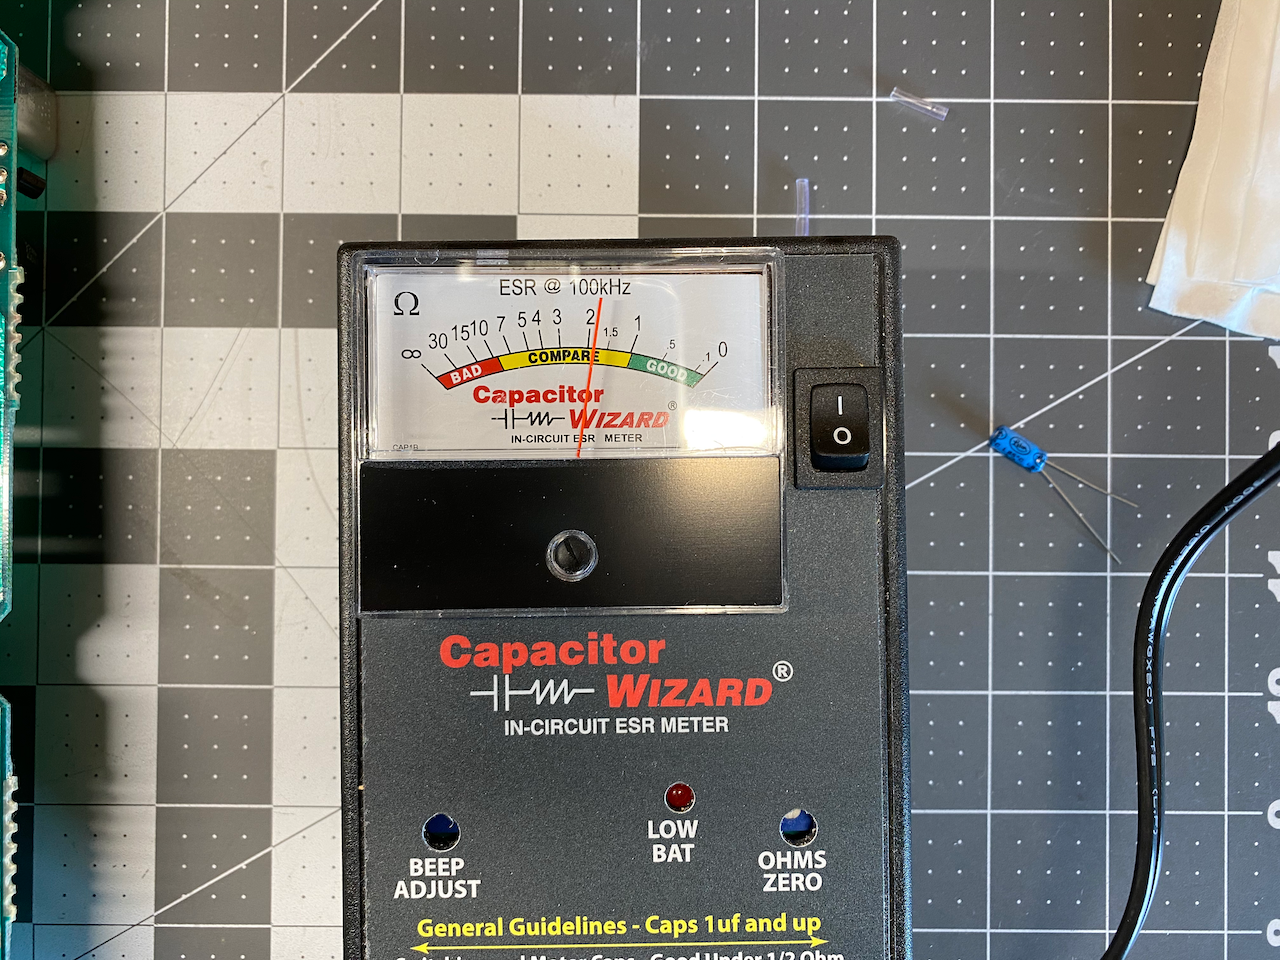
As stated below the label, (seen in the photo above) the Capacitor WIZARD is an "IN-CIRCUIT ESR METER". ESR stands for Equivalent Series Resistance, one of a few ways to detect the health of a capacitor. The Capacitor WIZARD is essentially an AC (Alternating Current) Ohm meter that outputs a low voltage sine wave (15 mV peak to peak, 5 mV RMS) at 100 kHz and then measures the equivalent series resistance of the capacitor being tested. The test signal output by this unit is designed to test the capacitor in circuit without activating anything in the circuit. The results obtained can be affected by other components in circuit, but is still much better than using a multimeter in capacitance mode.
Testing the Capacitors of My Atari 800
In the first post of this series, I fully disassembled and visually inspected my 800, but as soon as my Capacitor WIZARD arrived it was time to go through all of the electrolytic capacitors to make sure that they were in good condition, or as we used to label things when I worked on ship to shore container cranes, "GTG" Good-To-Go.
According to the readings and the manual for the Capacitor WIZARD, all of the electrolytic capacitors on the main board of the 800 were good except for one, (C179) which gave me a reading of "COMPARE" (seen in the photo above). The "COMPARE" indication means not necessarily good or bad, so "compare" the reading with a known good capacitor of the same type, value, and voltage rating. Luckily, I had a whole bin of 10 micro-Farad 16 Volt electrolytic capacitors to compare it to, and they measured better.
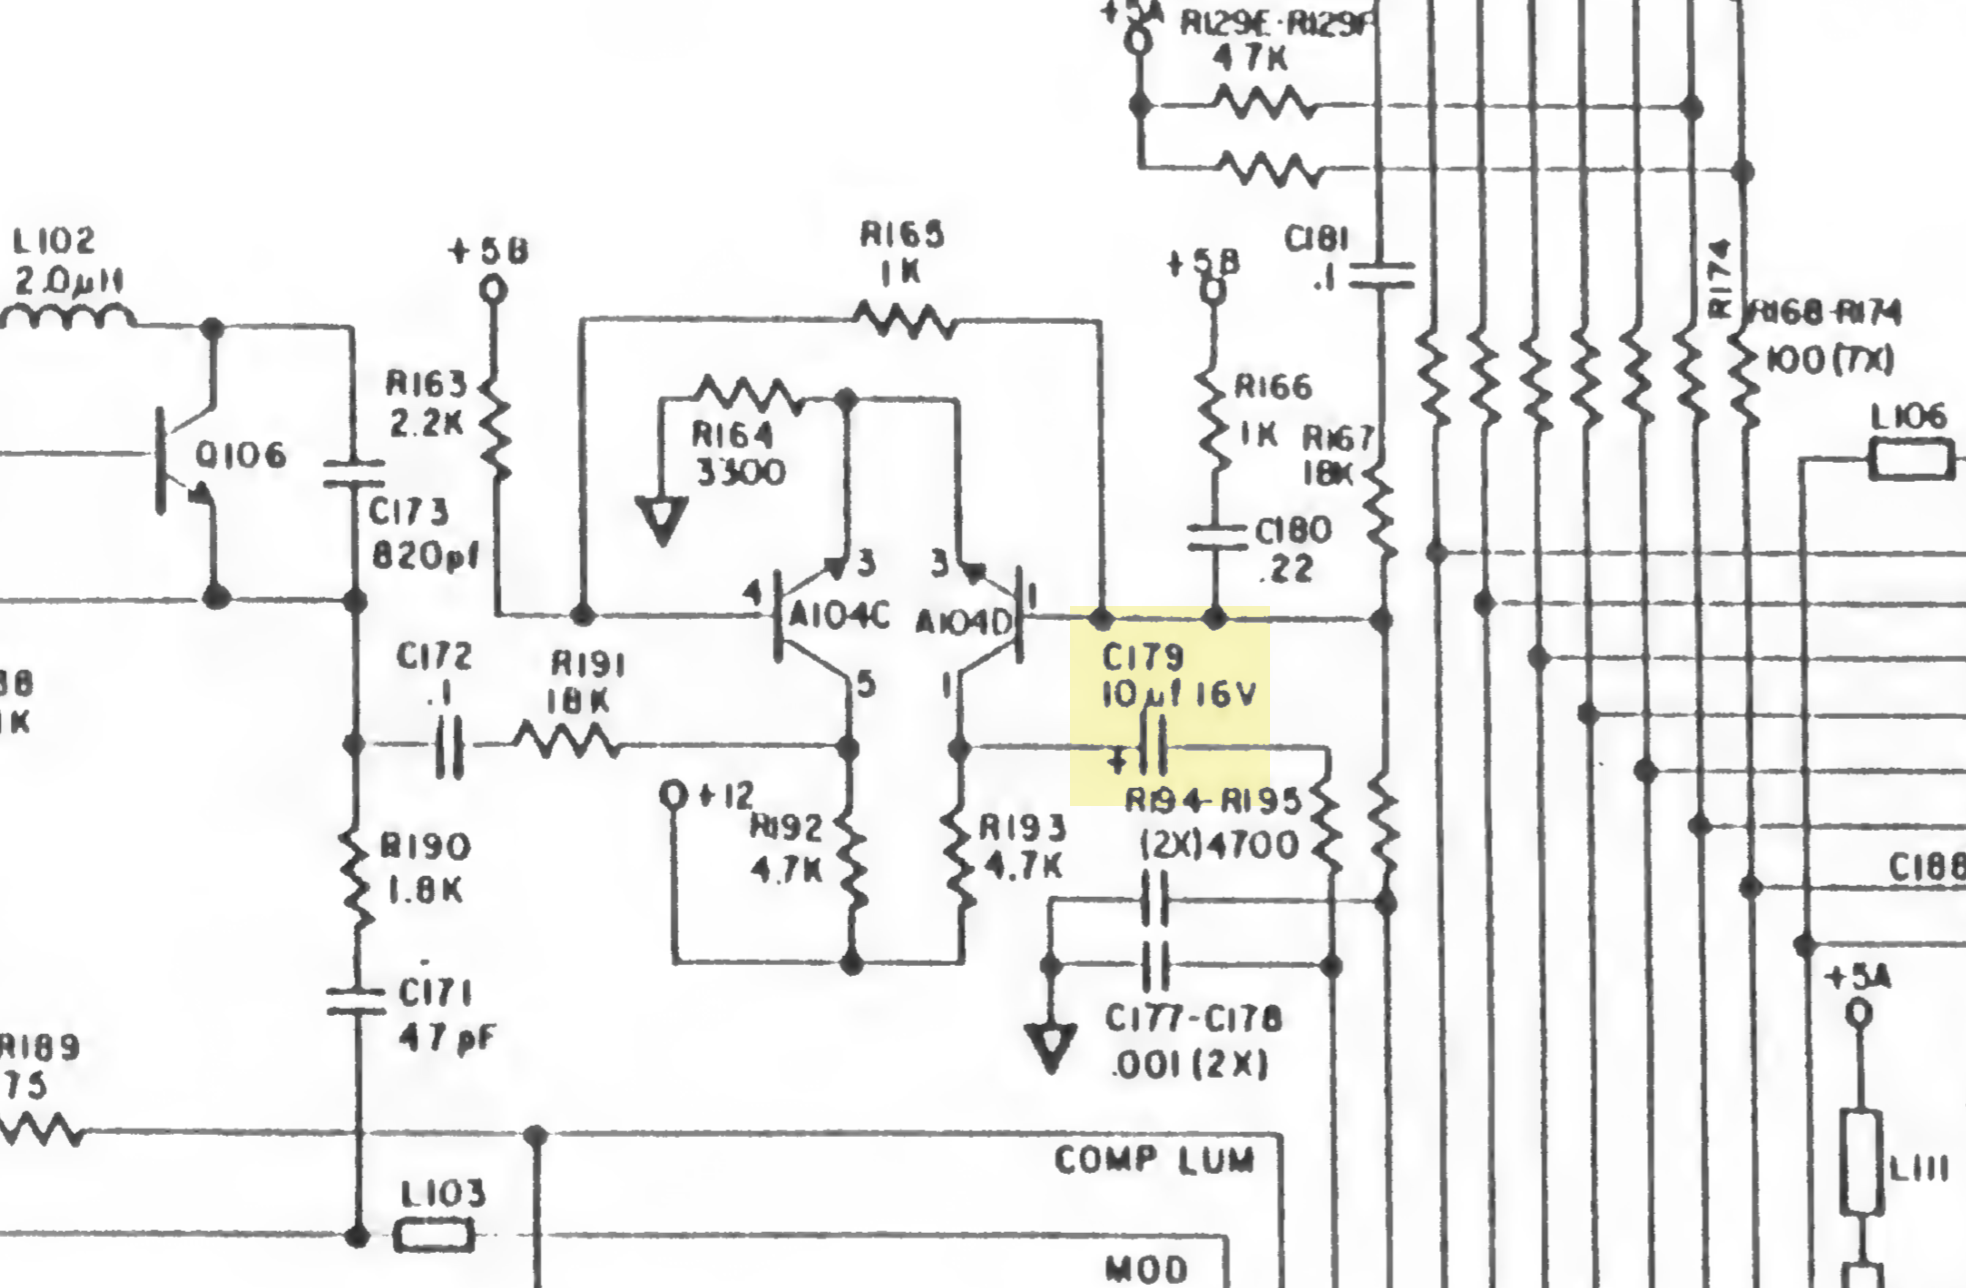
As mentioned in Part 1 of this series, I was able to download the Atari 400/800 System Service Manual from the Internet Archive, and it contains the schematics of both machines. Based on the schematics, it appears that C179 may have something to do with the audio output of the 800.
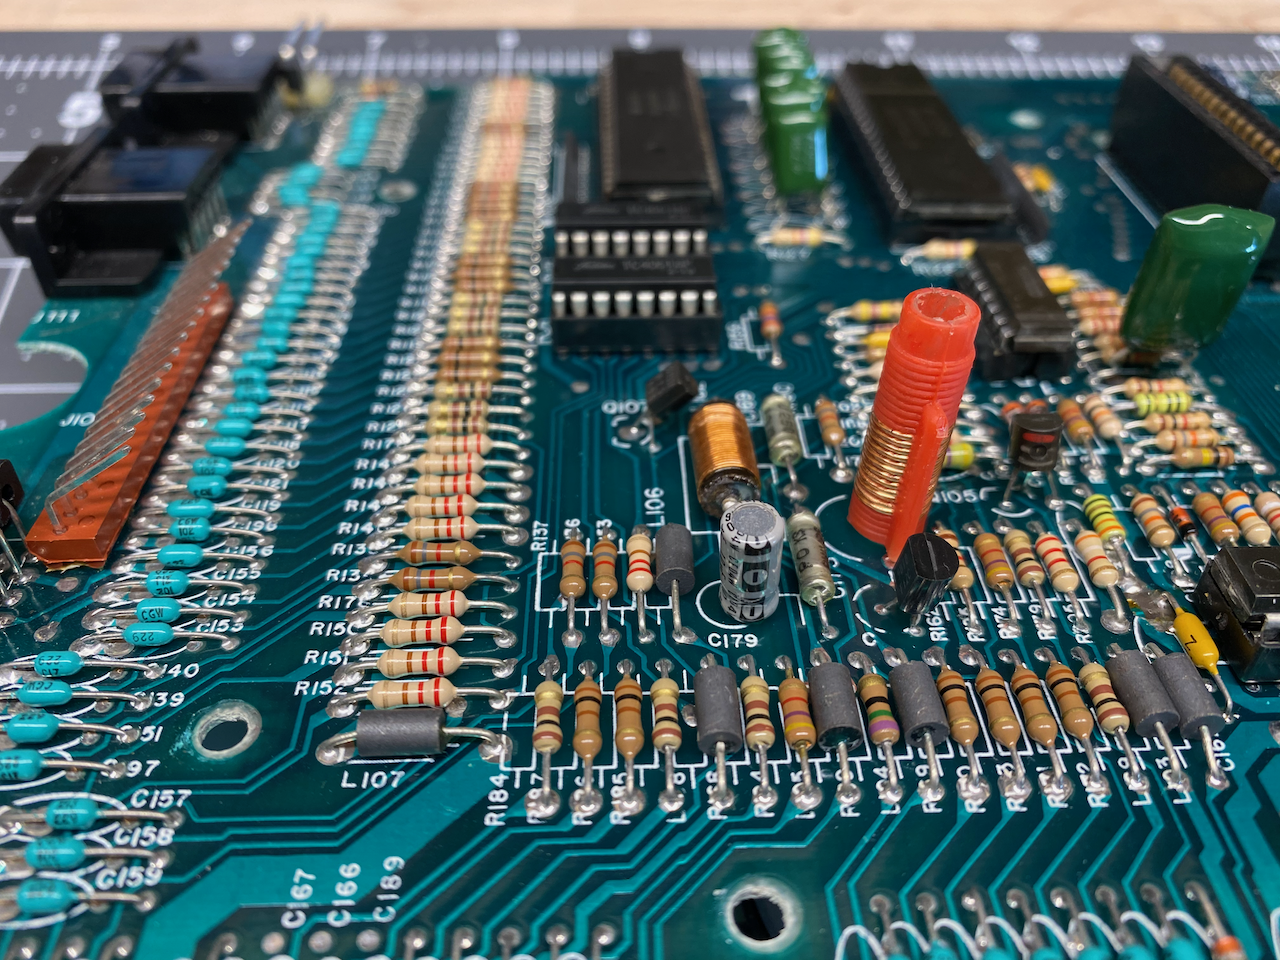
With the marginal capacitor identified, and having a good replacement on hand, it was time to desolder the original and replace it. I used desoldering braid to remove the original capacitor, and then soldered in the replacement.
First Power Up & Composite Video Via VGA
At the time that I purchased my 800, I owned one LG brand LCD monitor with only HDMI inputs, and one LG monitor that had HDMI & VGA inputs. I had planned on using a video converter that I purchased about a year prior on Amazon, the SLLEA RCA Composite AV S-Video to VGA Converter Box, along with a DIY "Frankenstein Adapter Cable" using a DIN style MIDI cable and an RCA style composite video cable.
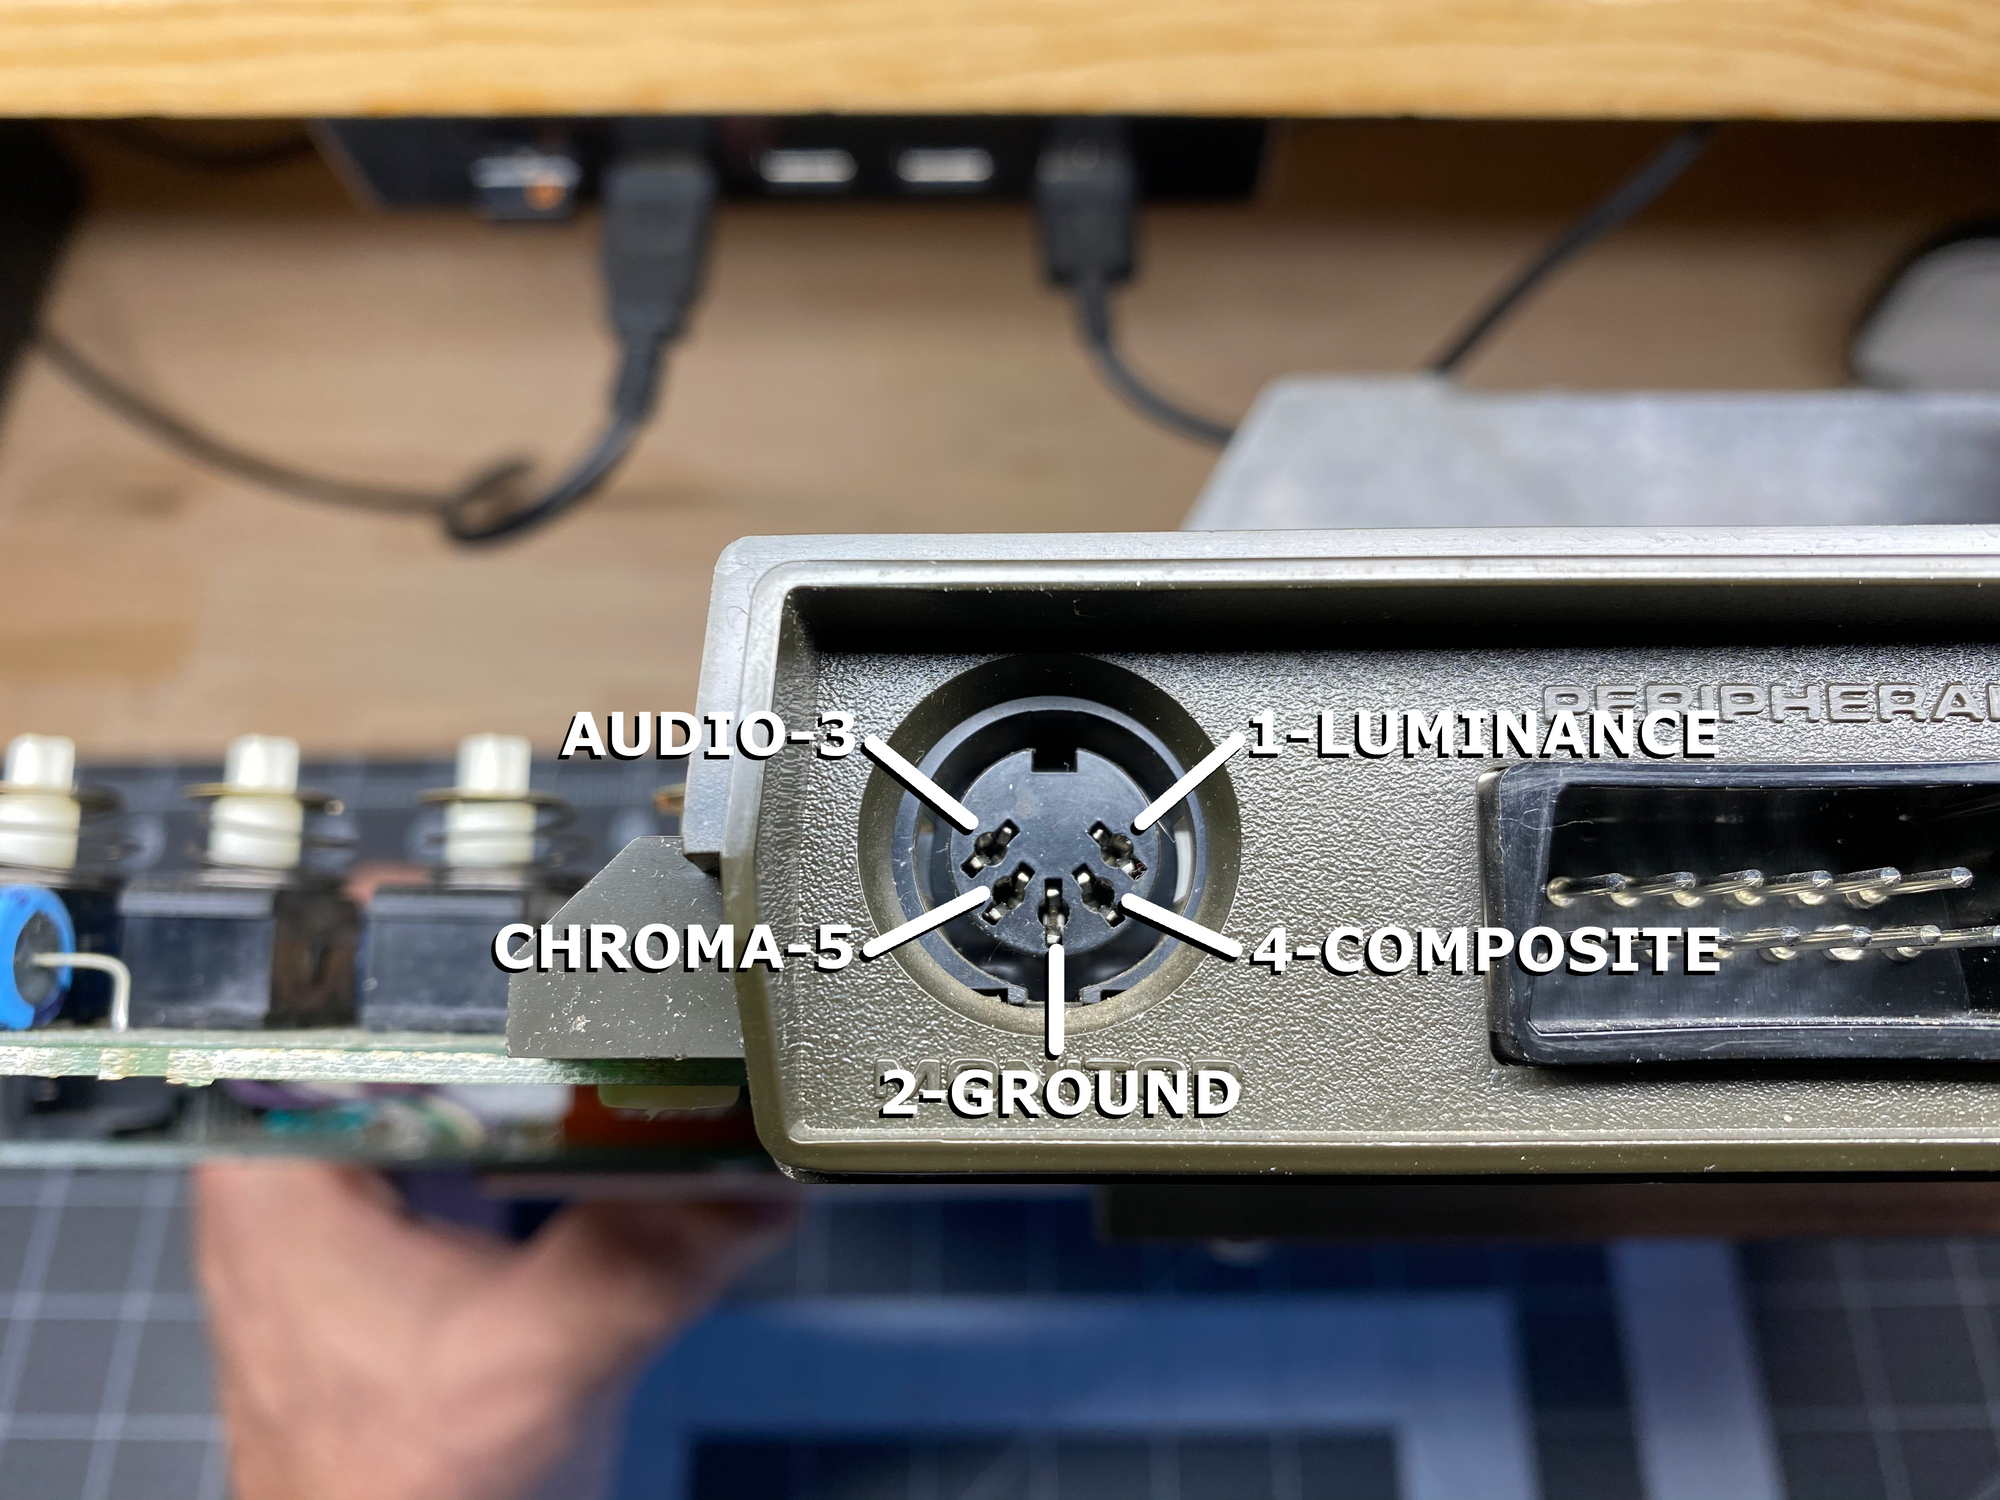
That first "Frankenstein Adapter Cable", let's call it Version 1.0, was made by only using the ground level on pin 2, and the composite video signal on pin 4. I connected the Frankenstein cable between the 800's Monitor port and the composite input port of the Composite to VGA converter. The VGA output of the converter was then connected via a VGA cable to the LCD display's VGA input port. When I turned on the computer I was excited to get an image on screen, but bummed out that it had no color!
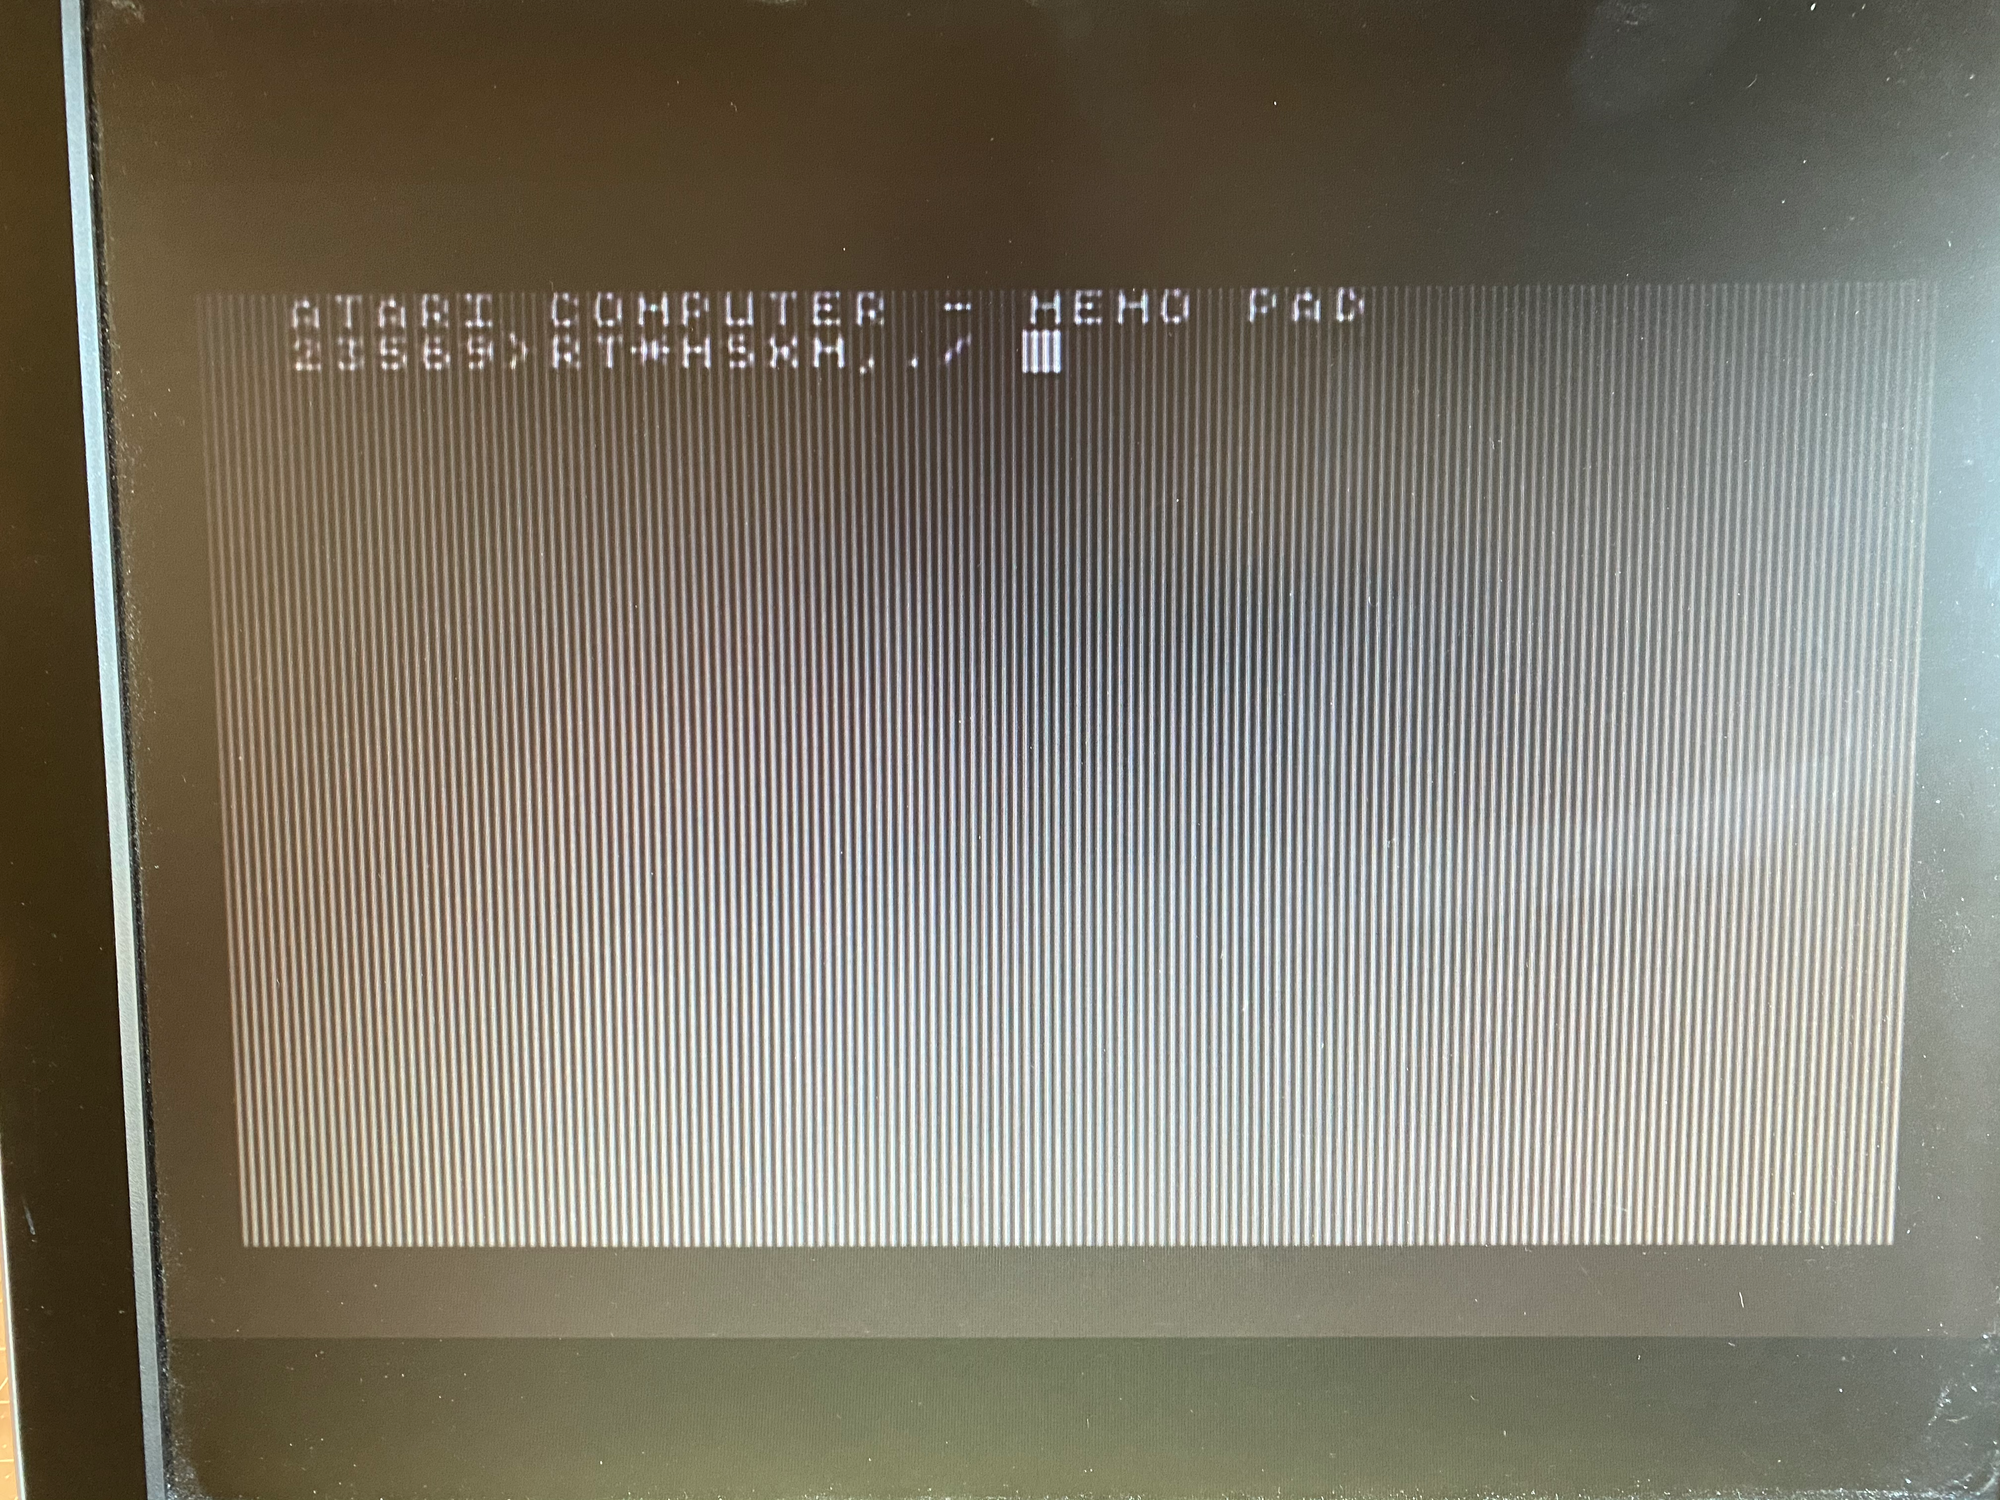
To troubleshoot why I wasn't seeing color, I connected a VCR through the Composite to VGA Converter to the LCD display and when doing that I had color, so I could pretty much assume that the monitor and the converter were working correctly, but did that mean that there was a problem with my Atari 800's composite video signal?
Join A User Group, Learn & Make Friends
I strongly encourage everyone to join a user group of like minded people. There is no replacement for having a place to learn and share tips, tricks, and ideas. Due to the problems I was experiencing with the video signal from my 800, I looked around the Internet for sources of information on the Atari 8 bit line of computers, and quickly noticed that a lot of recent links for what I was looking up were from the Atariage Forums. Atariage has forums specifically for the 2600, 5200, 7800, Lynx, Jaguar, and most importantly for me, the 8 bit series of home computers!
I signed up as a member and made my first posts on a thread titled Atari 800XL on VGA to find help as to why I wasn't seeing color with my composite video connection, and where to go next.
Frankenstein Adapter Cable Version 2.0
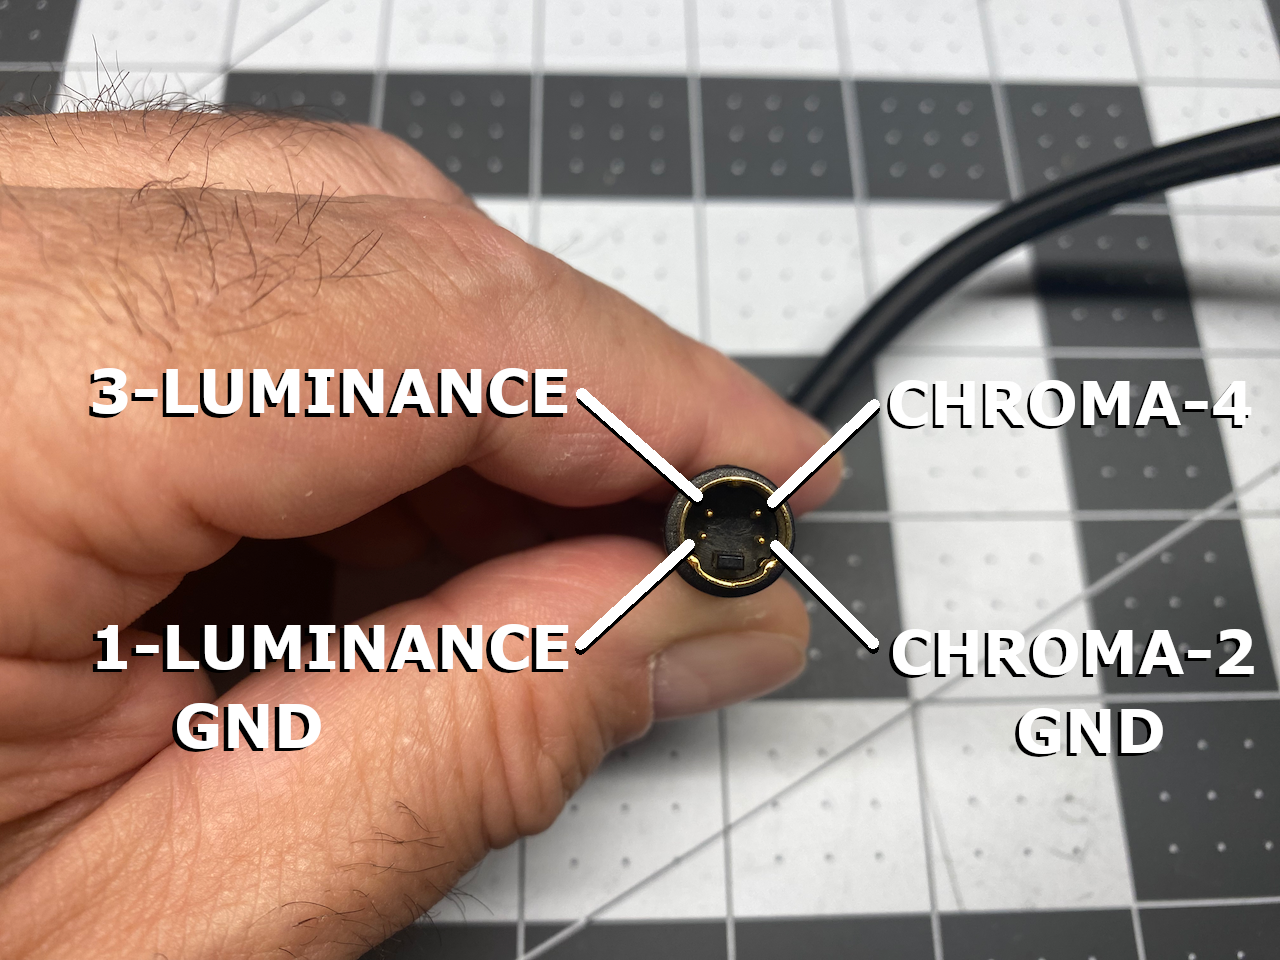
I found that I wasn't the only person having problems with the Composite to VGA Converter unit, which I tried again using S-Video instead of simple composite video; this became Version 2.0 of the "Frankenstein Adapter Cable". The new cable used all pins of the 800's Monitor port except pin 4 - Composite.
One difference between composite video and S-Video is that composite has the luminance, hue, and saturation signals for the video image all combined on one pin, where S-Video has the luminance and chroma signals on two separate pins. Separating the luminance and chroma makes for a much better image quality from what I've read, and although I am no expert in video electronics, it makes sense in an intuitive way.
Another change I made in Version 2.0 was that I connected two separate RCA cables between the audio on pin 3 and ground on pin 2 of the 800's monitor port. The audio from the 800 is mono, but I wanted to drive both channels of the stereo speakers in the monitor.
Changing from composite to S-Video on the VGA Converter unit still didn't change the fact that I was getting black and white on my monitor. I was starting to get bummed out that even the S-Video didn't work. Then I remembered that my mother-in-law had an old Samsung Smart TV in her room that might have an S-Video port, which it did. When I connected the 800 directly to the Smart TV's S-Video input it worked - I had color!
After giving my mother-in-law her TV back, I headed back to Goodwill to locate an LCD monitor with either composite or S-Video ports, and lucked out - I found one with composite, component, S-Video, VGA, & HDMI inputs, and it only set me back $19.99!
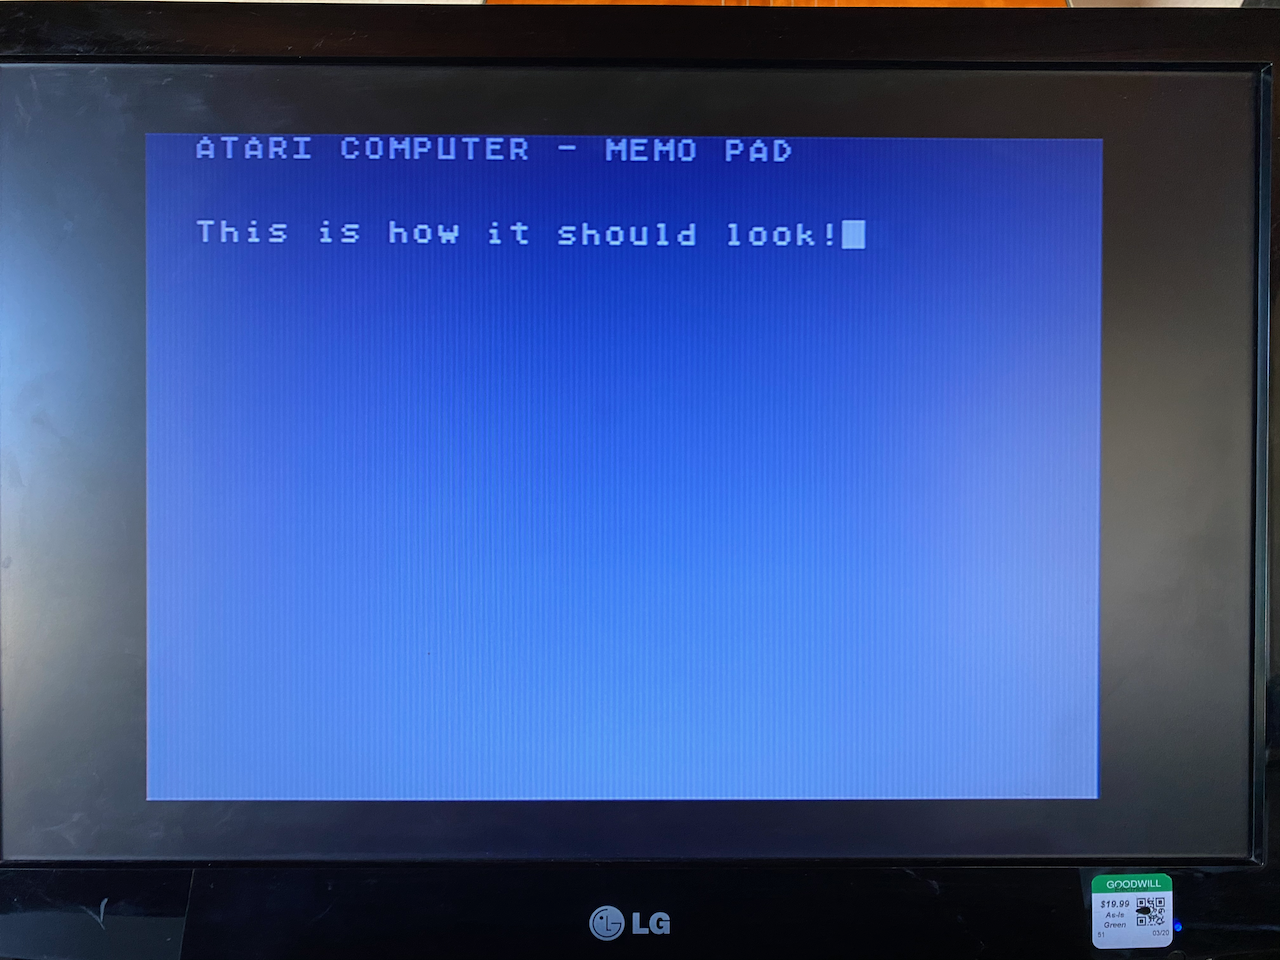
Taking the video converter out of the loop and going direct from the 800 to the monitor with S-Video did the trick! I use the same monitor for my ZX81 which is black & white composite only, for my Atari 800 using S-Video, my Apple II+ using composite, and my Raspberry Pi using HDMI.
Keyboard Issues
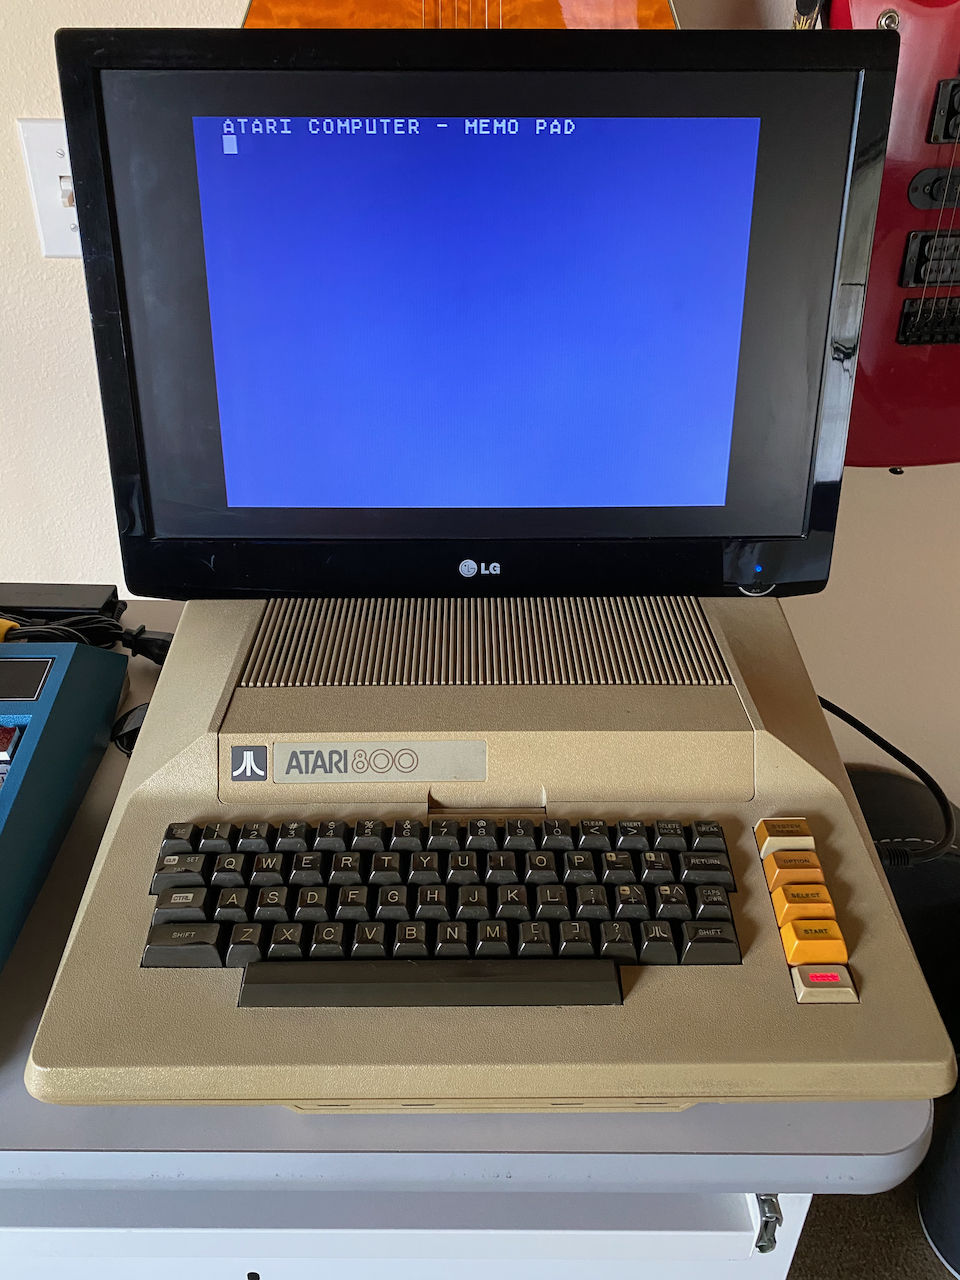
Now that I had video, I could use Memo Pad - it's the only thing that comes up on the Atari 800 without a cartridge inserted or a program to load from disk. But as soon as I started typing, I realized that quite a lot of the keys on the keyboard were intermittent or didn't work at all. Not a happy moment...
I scoured around for help on how I might be able to fix the keyboard, knowing that sourcing a new/old stock keyboard was not going to be easy. I came across a YouTube video from flashjazzcat that worked for me.
At 08:30 into the video, flashjazzcat removes what he refers to as "the crappy adhesive layer". He later uses conductive paint, (which I didn't have) but I was able to remove the adhesive layer, clean it up a bit and add material to increase the pressure between the mylar sheet and the PCB. After reassembling everything, my keyboard worked like new.
All Memo Pad & No Play Makes the 800 A Dull Boy
In the next post, I will get a BASIC cartridge, and get the 810 floppy drive housing repaired and connect the drive to the computer. See you then!