
ZX81/TIMEX-SINCLAIR 1000 3D Printed Case - Part 1

This post covers a collaboration between my brother and I to right a wrong that goes back over forty years! We join forces to develop a scaled up prototype ZX81 computer case that is large enough to fit a mechanical keyboard I built in two previous posts to replace the membrane keyboard that came with the ZX81/TS-1000.
"Where's The Beef?"
Over forty years ago, when my brother and I first got our little boy hands on the new ZX81 computers that we were excitedly and impatiently awaiting the arrival of, both of us thought, "Is that it? They looked so much bigger in the magazine ad."
As I have mentioned in the ZX81/TIMEX-SINCLAIR 1000 Custom Mechanical Keyboard Prototype - Part 1 post:
"The ZX81 was the first computer I ever owned. It was a moment of bittersweetness when I opened the box that contained my Zeddy, excited to finally have a computer that I could call my own, and use whenever I wanted, but extremely disappointed when I finally held it in my hands and saw how small it actually was. Even for a thirteen year old who hadn't hit his growth spurt yet, keying in BASIC programs on the tiny membrane keyboard was not a thing of joy."
After building what I consider to be a much better keyboard than the original membrane keyboard, I was left with a new problem...
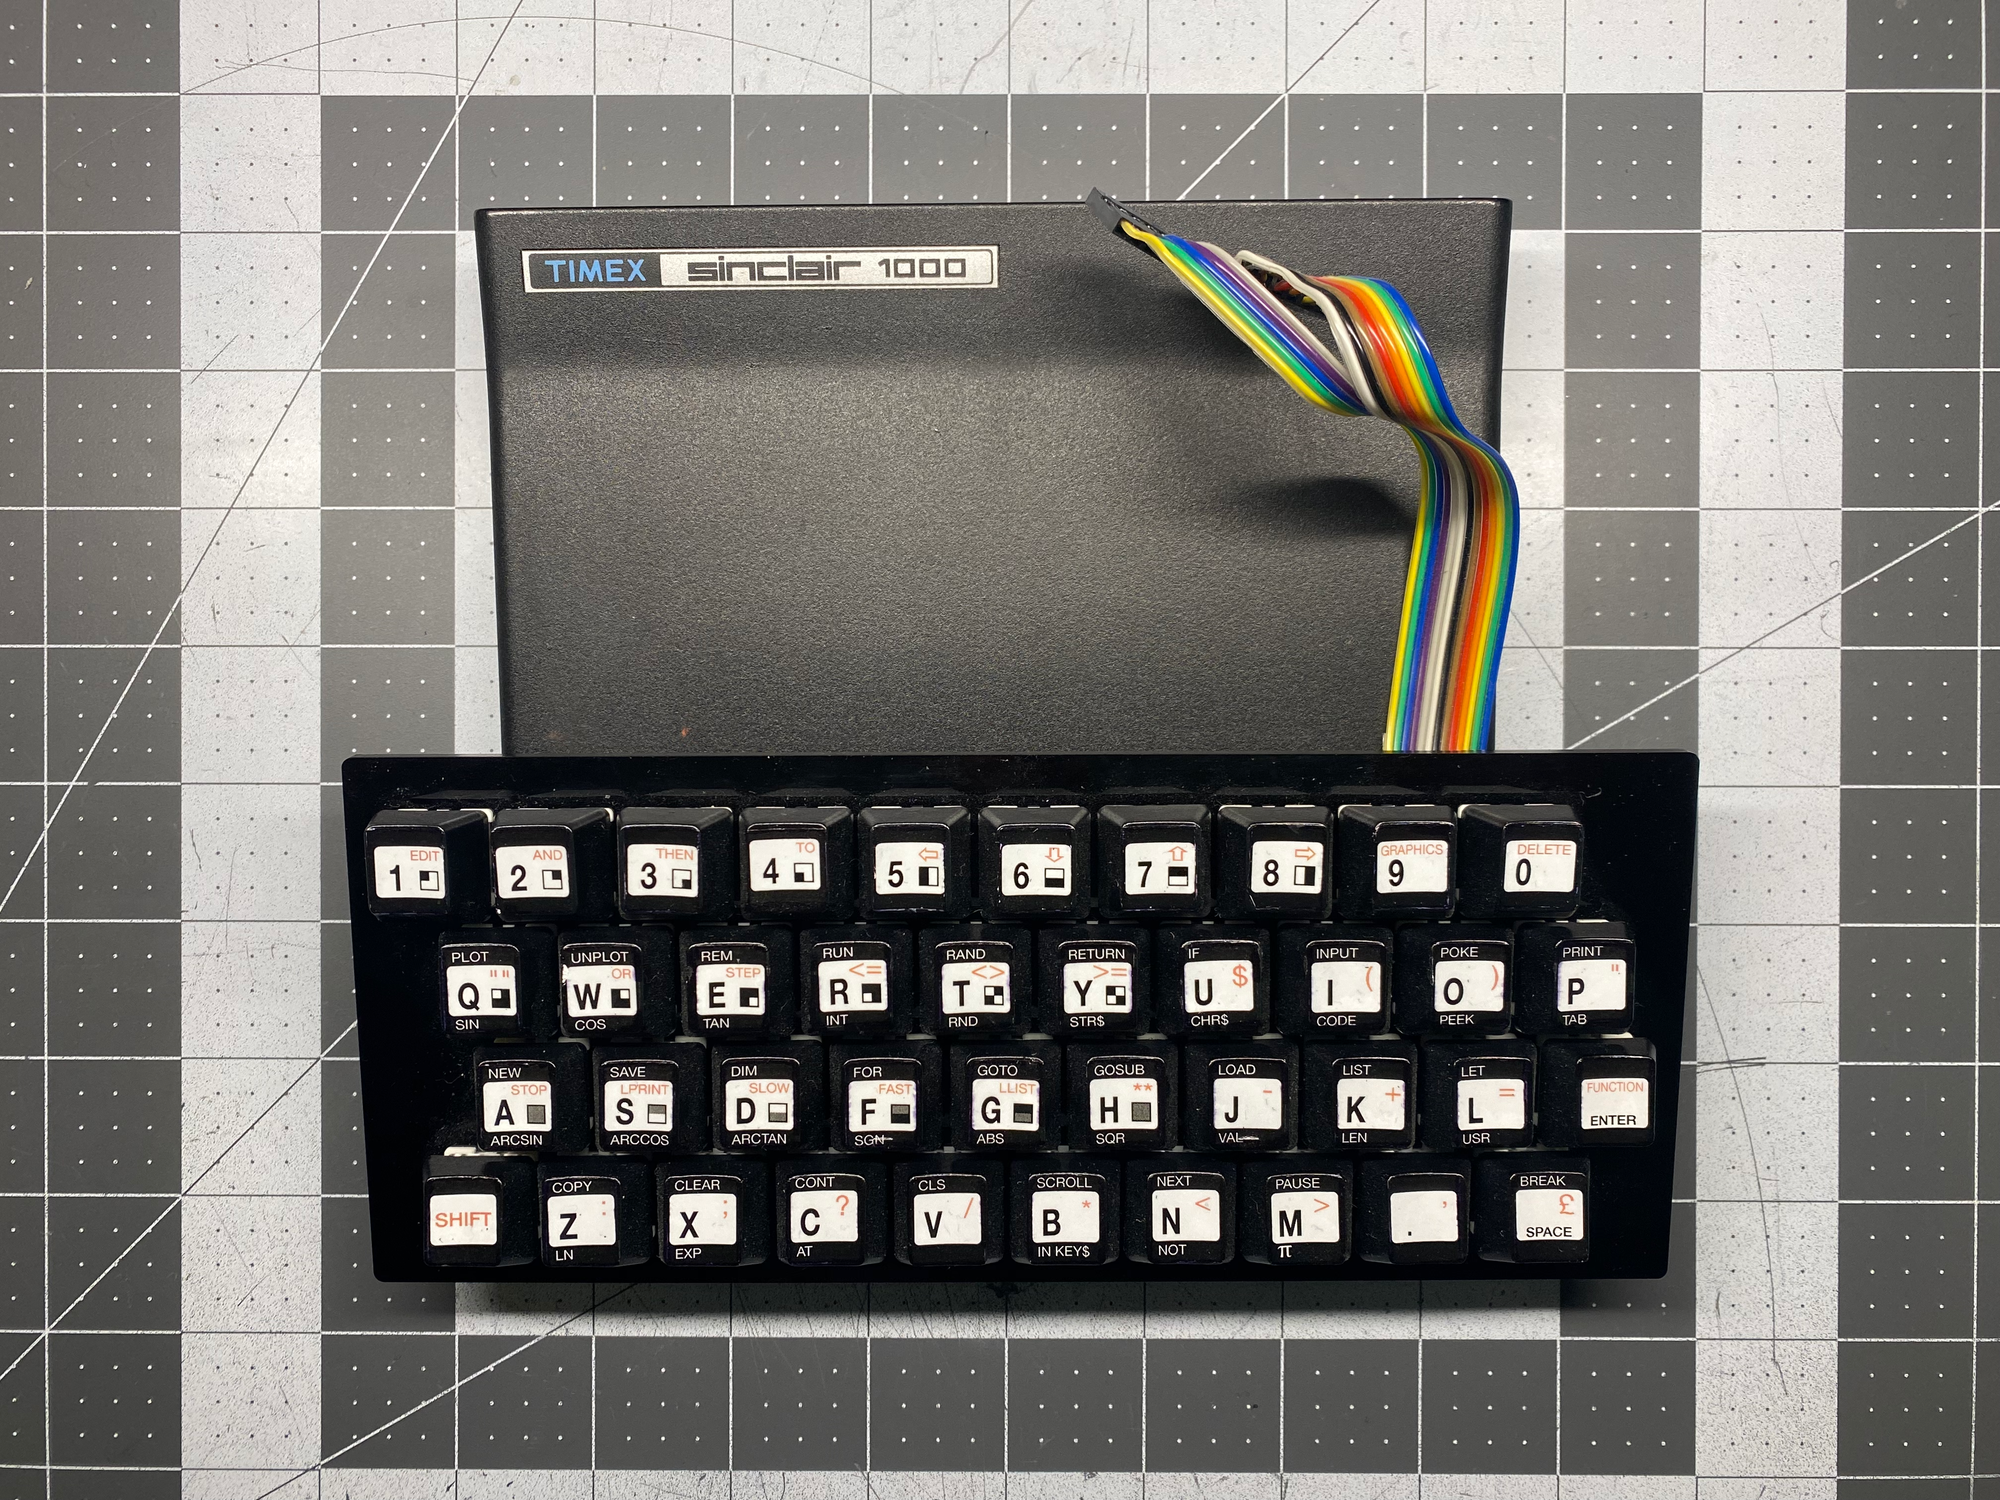
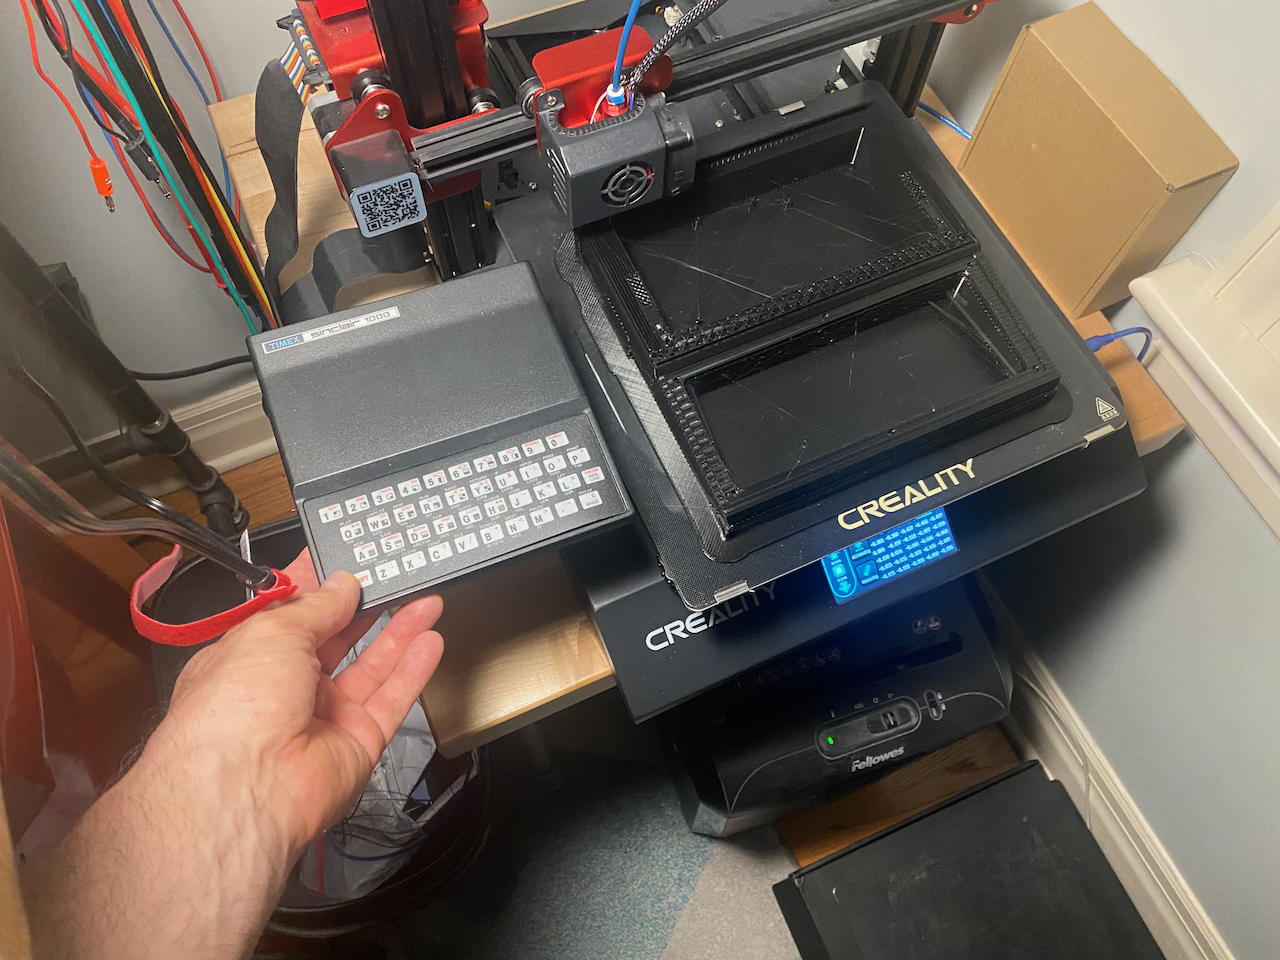
How do I mount my new keyboard on that tiny little case?
Please don't get the wrong idea from all my complaining about the size of the ZX81/TS-1000, it made computing affordable and approachable for so many people, and still is an amazing feat of design and engineering.
3D Printing a Case
For my birthday last year I got a Creality CR-10S Pro V2 3D printer because I really wanted to be able to start making custom enclosures and cases for my retro-computing electronics tinkering projects. For the mechanical keyboard, I was originally thinking to keep it simple and just making a simple keyboard case to contain the prototype mechanical keyboard. After some conversations with my brother, we decided not to "cheap out" and to go right to a larger scale version of the iconic ZX81 case.
From our discussions, the long term plan is to make a case big enough to enclose a 60% keyboard (project name: "Mega-Zed"). For now, we can get some practice with a case just large enough to house the prototype keyboard (and besides that, my printer's build plate isn't big enough to print that large of a case in one go). Currently this project's name is "Kilo-Zed", not quite a "Mega-Zed". 🤣
Creating a 3D Model To Print
My brother has his own CNC milling machine amongst other goodies in his machine shop. For the last two and a half decades he has been using an application called Pro/ENGINEER to do his design/modeling work. He took on the challenge of building a scaled up 3D model of his ZX81 from scratch in Pro/E by painstakingly measuring every dimension of his case. In addition to scaling up the size of the original case, he designed his model so it would accept the keyboard switch plate from my prototype mechanical keyboard, and instead of making it in top and bottom halves, he made it mostly a uni-body case with a removable top cover.

I have been learning to use FreeCAD, a truly free and open source CAD (Computer Aided Design) application, mainly because Pro/E is beyond my budget for the rare modeling/design work I do. The nice thing is that I can open the .stl files that my brother creates in Pro/E in FreeCAD and preview the model before it goes to the slicer program.
Ultimaker Cura Slicer Application
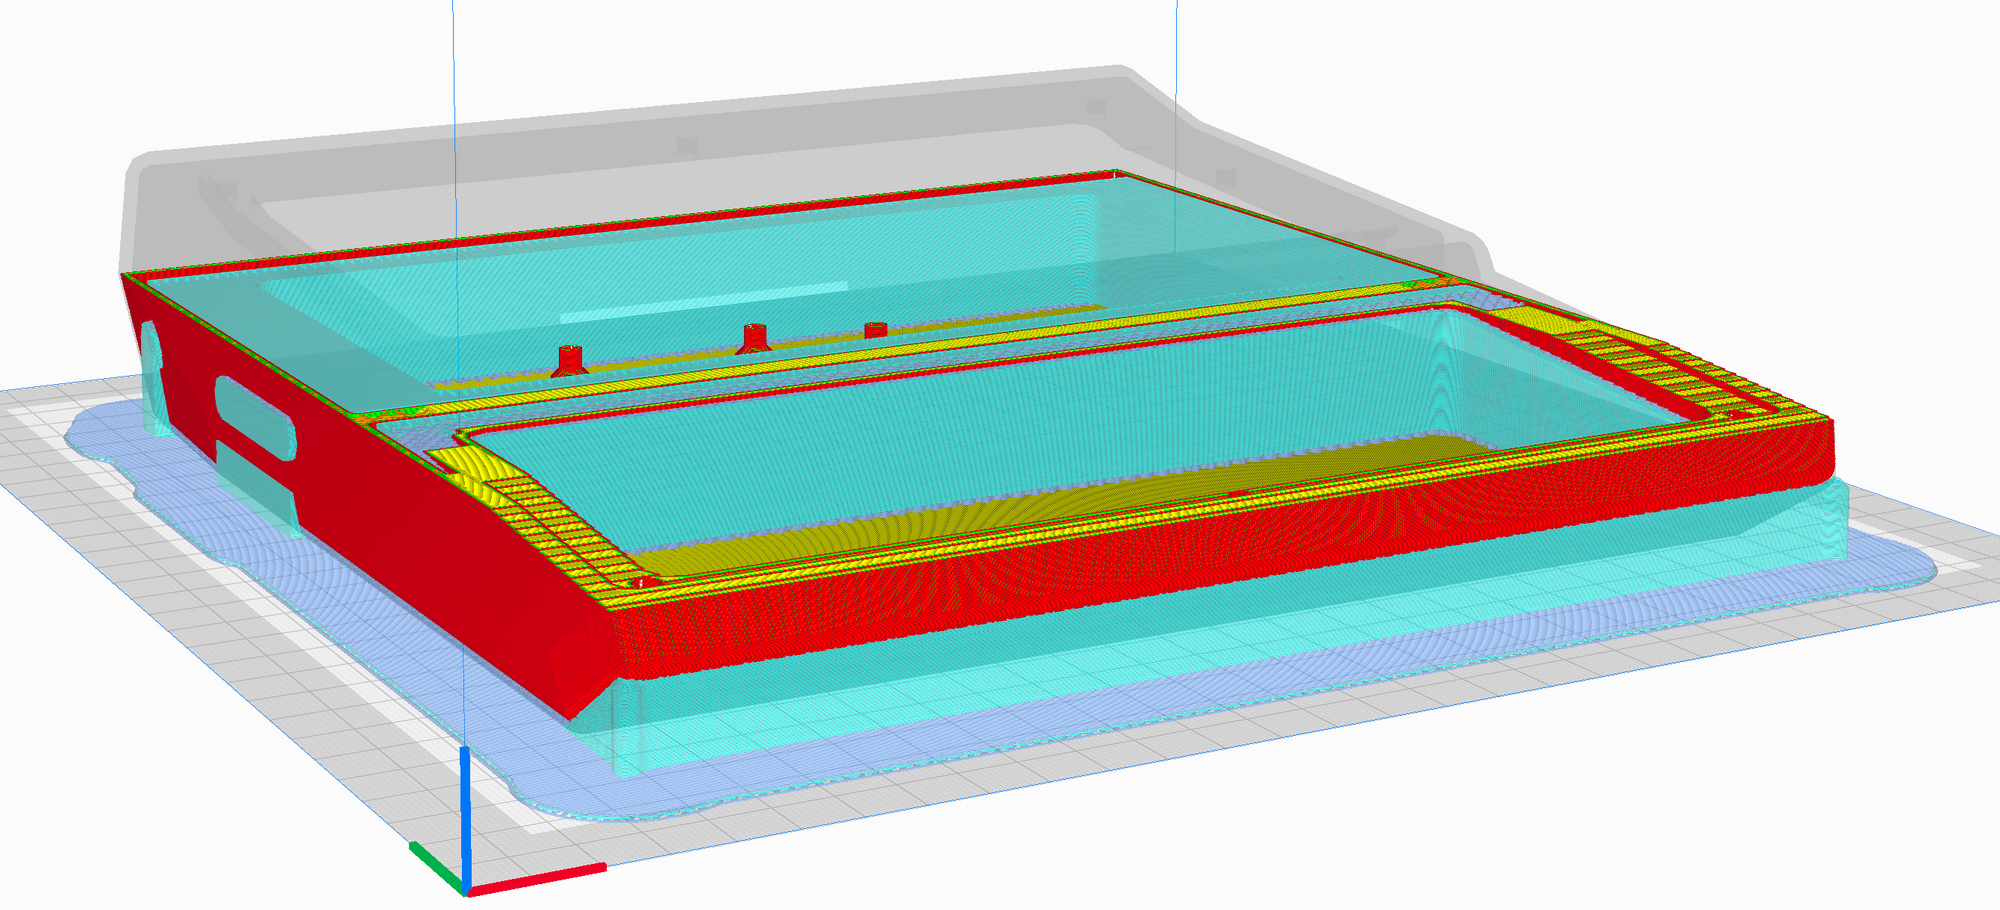
Ultimaker Cura is an open source and free to use multi-platform slicer application. Some of you may be asking, "what the heck is a slicer application?" Well, let me tell you...a slicer is an application that can take a 3D model that you give it, and combining some settings for your particular 3D printer, and some other settings based on your printing preferences, virtually slice that model up into layers as thick as the layer height that your printer will extrude out of it's nozzle. This post isn't intended to be a tutorial on 3D printing, so going back to the scaled up 3D model of the new computer case that my brother made for me to print, I fed the .stl file into Ultimaker Cura, which then gave me the following as a preview:
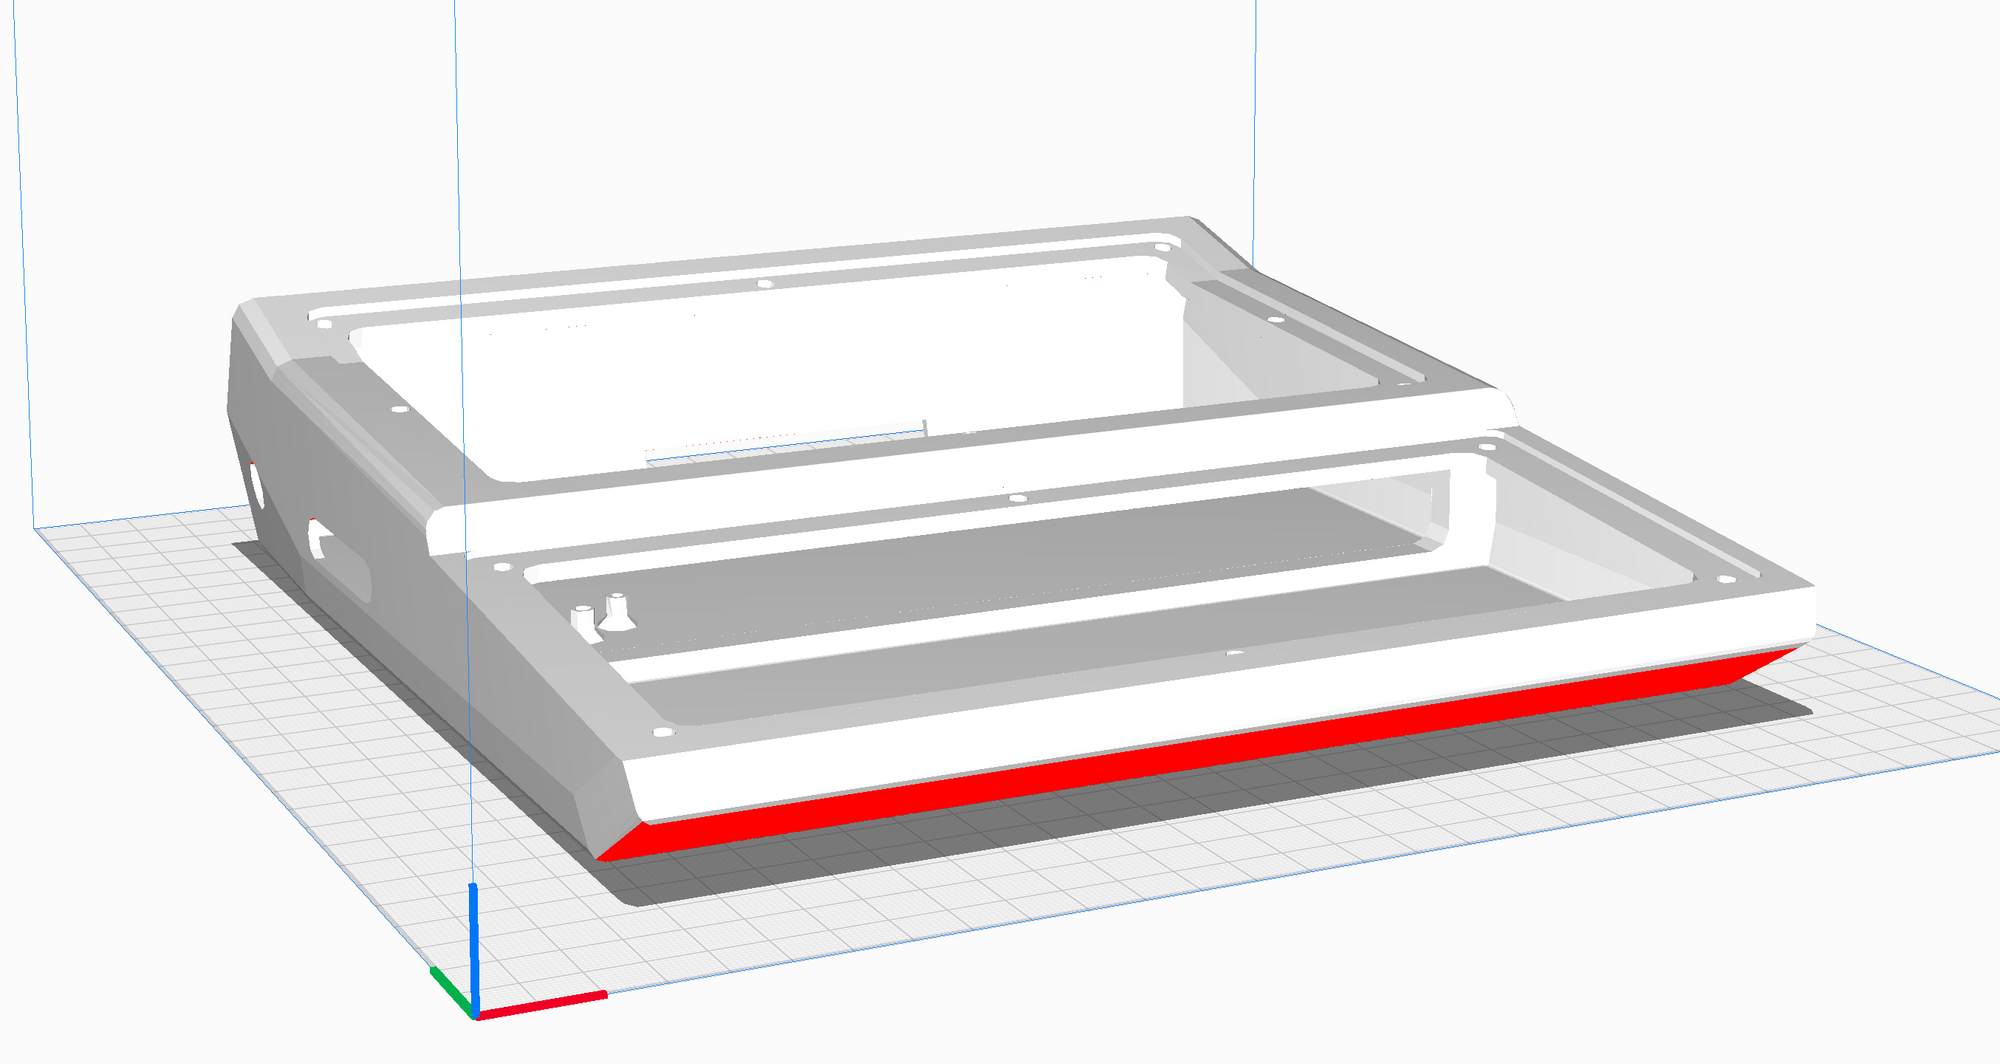
One of the really neat things about Cura is that once you have set your settings and ask the application to "Slice" your model, you get a layer by layer preview of the print job, the estimated time it will take, and how many grams of filament will be required. Below is a screenshot of the "Preview" View taken somewhat more than half way through the actual print of the first case prototype:
OctoPrint Raspberry Pi Print Server
Once the model has been "sliced" by Cura, it generates a list of G-code instructions. G-code is the most popular programming language ever used for CNC (Computer Numerically Controlled) machines. Cura can send the generated G-code to the 3D printer in several ways, but in my case, I have a Raspberry Pi setup up as a 3D printer server using the free and open source OctoPrint. If you have a 3D printer, and aren't already using OctoPrint, you've got to try it! If you like it as much as I do, don't forget to send Gina a donation for making such a great tool freely available to the world of makers.
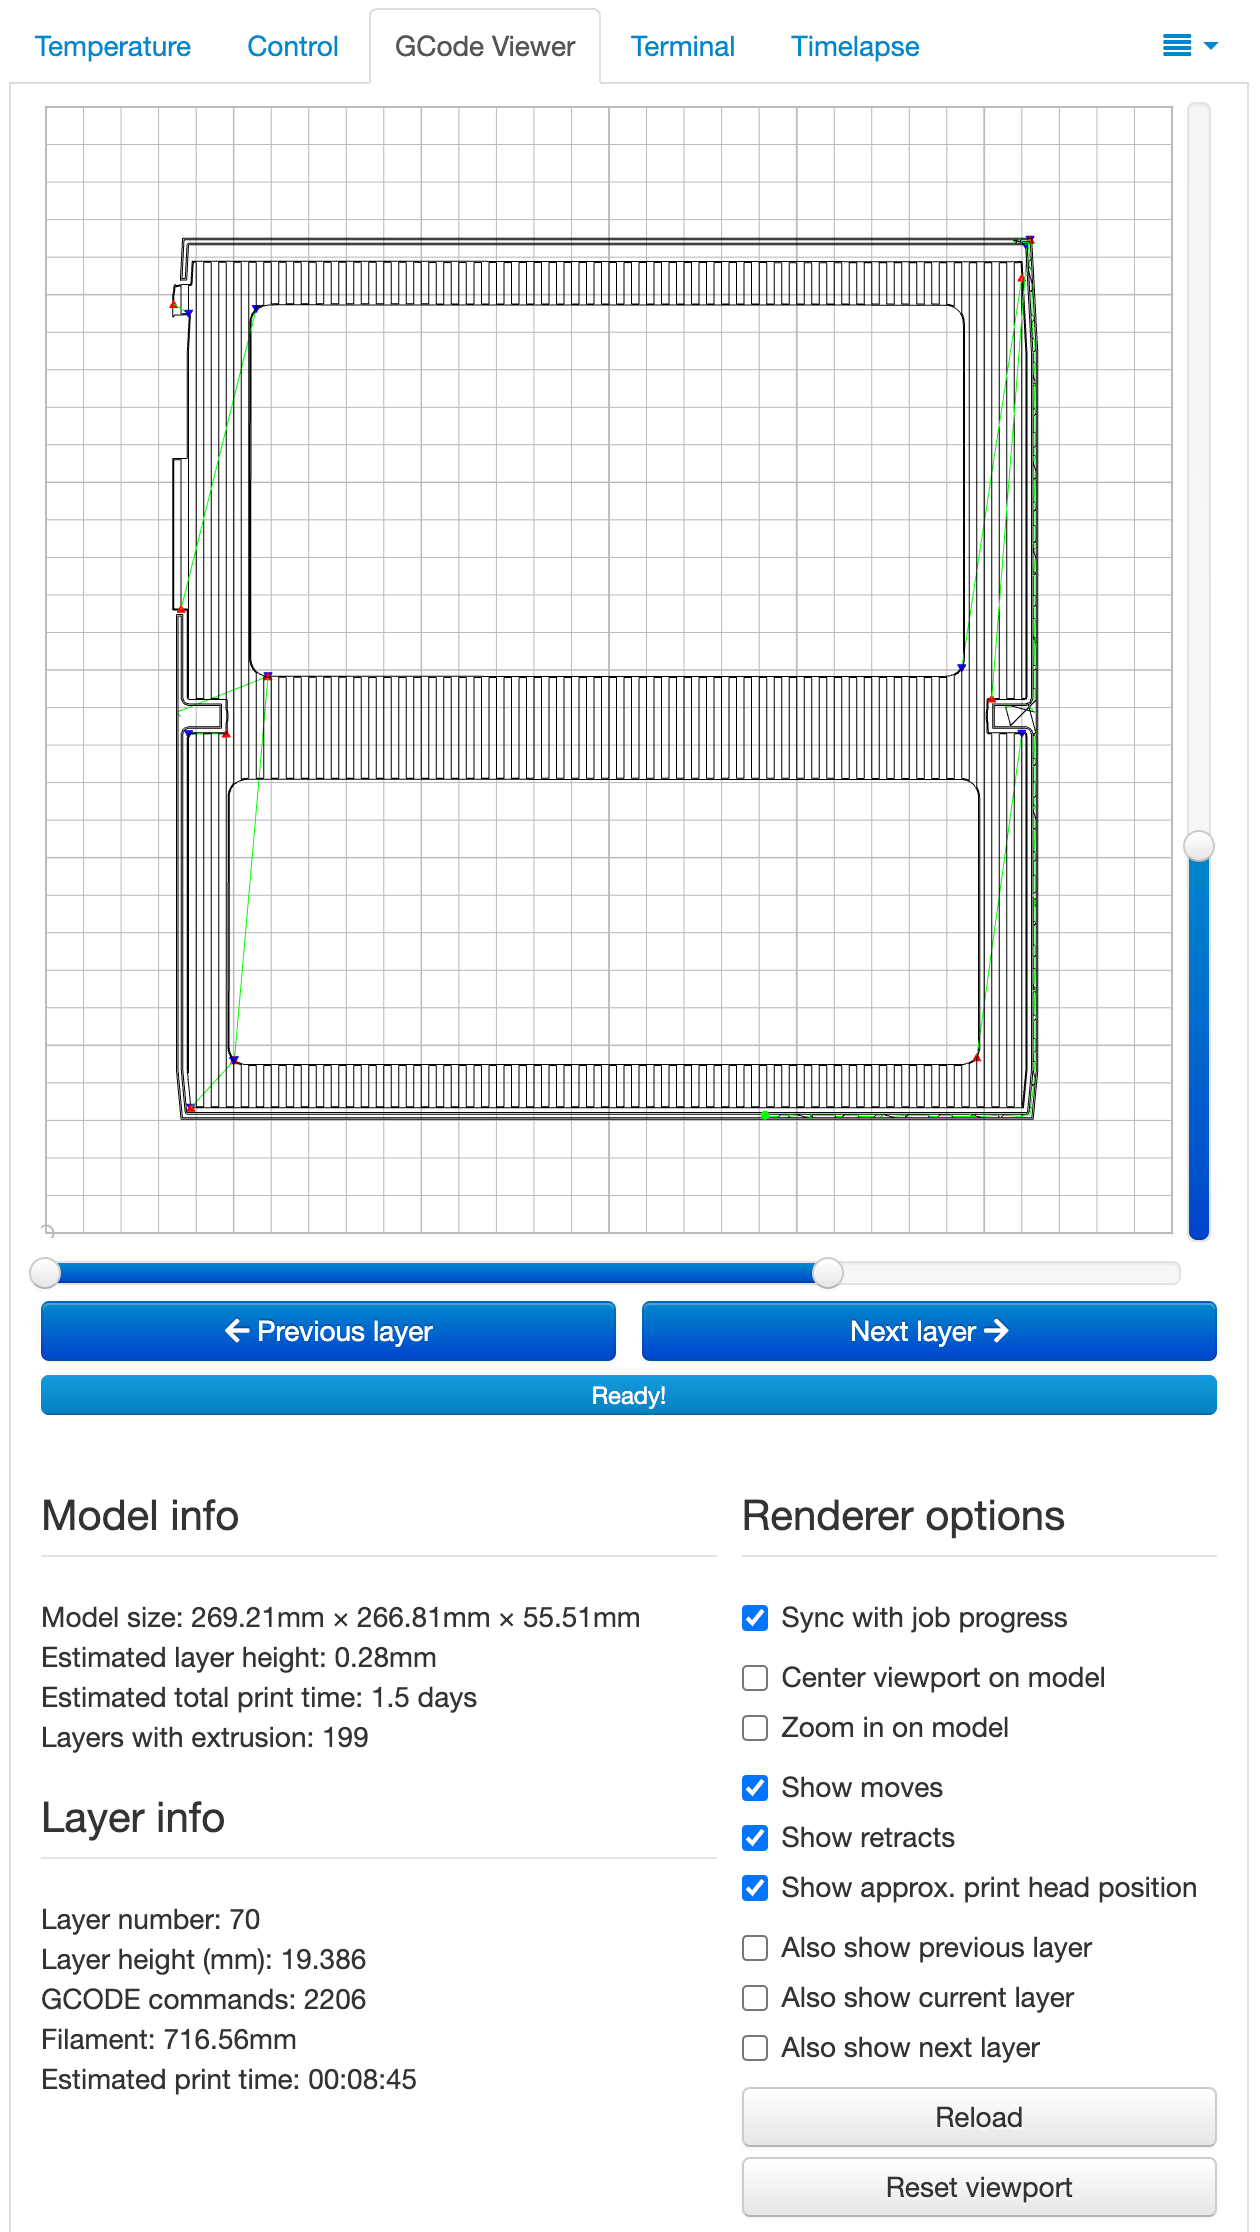
OctoPrint has an amazing web interface that runs in your browser. I cannot begin to cover all the features here because there are so many, but in keeping with the flow of this post, once the G-code has been sent from Cura to OctoPrint, one is able to see a live preview of each layer as it is being sent to the printer:
And here is a YouTube Short of the actual case being printed:
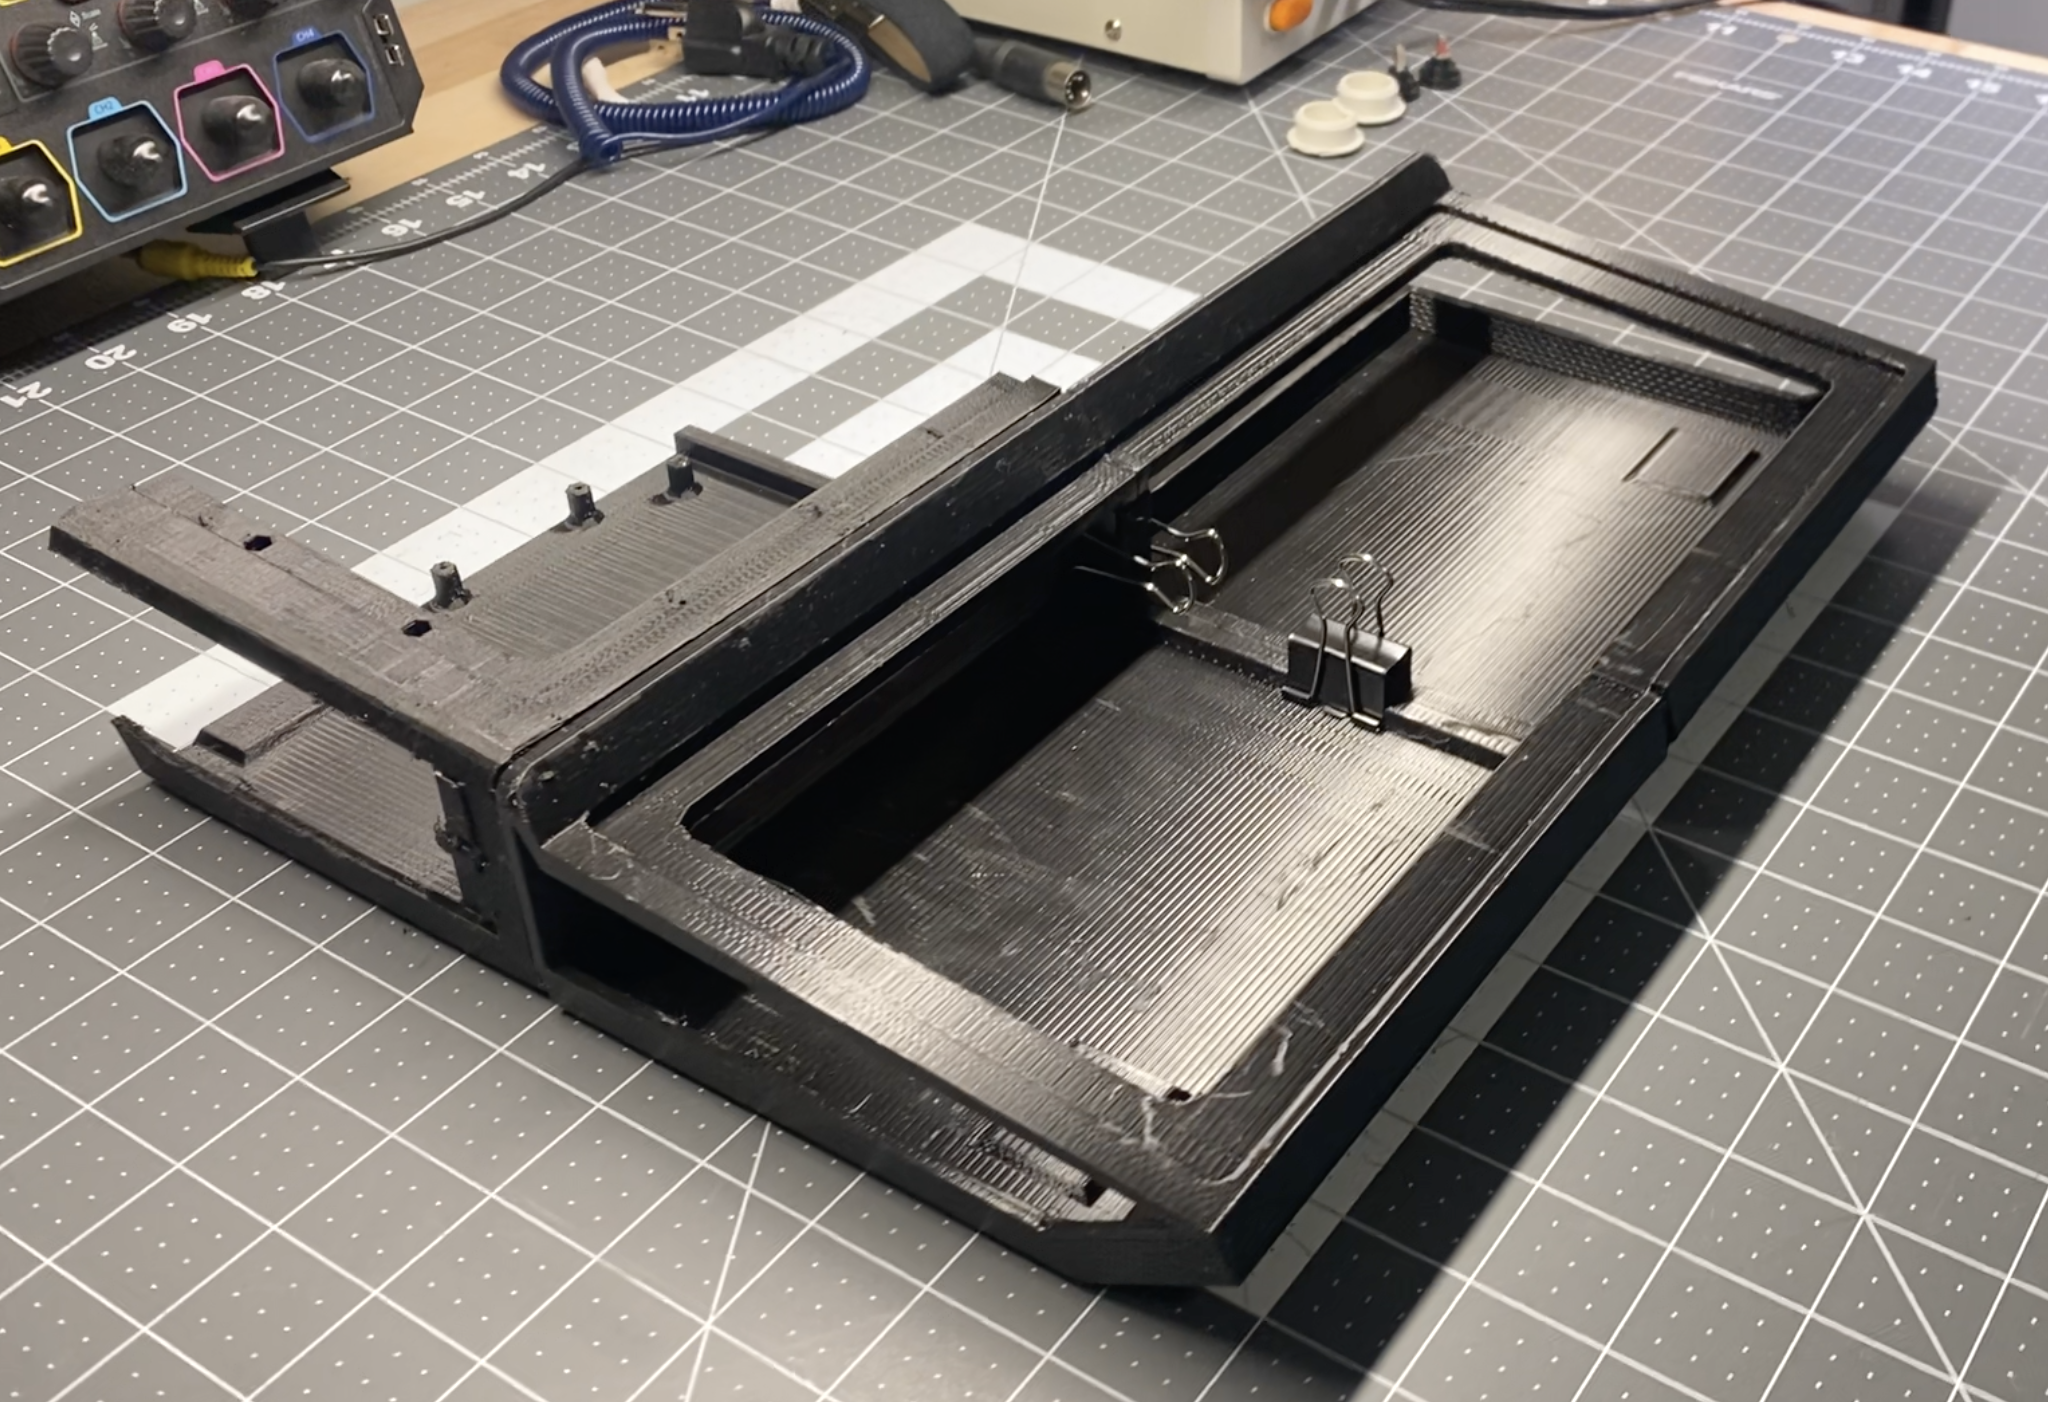
The case took roughly FORTY TWO HOURS TO PRINT!!! And when the printing was done, it was time to cut and break away all of the support material.
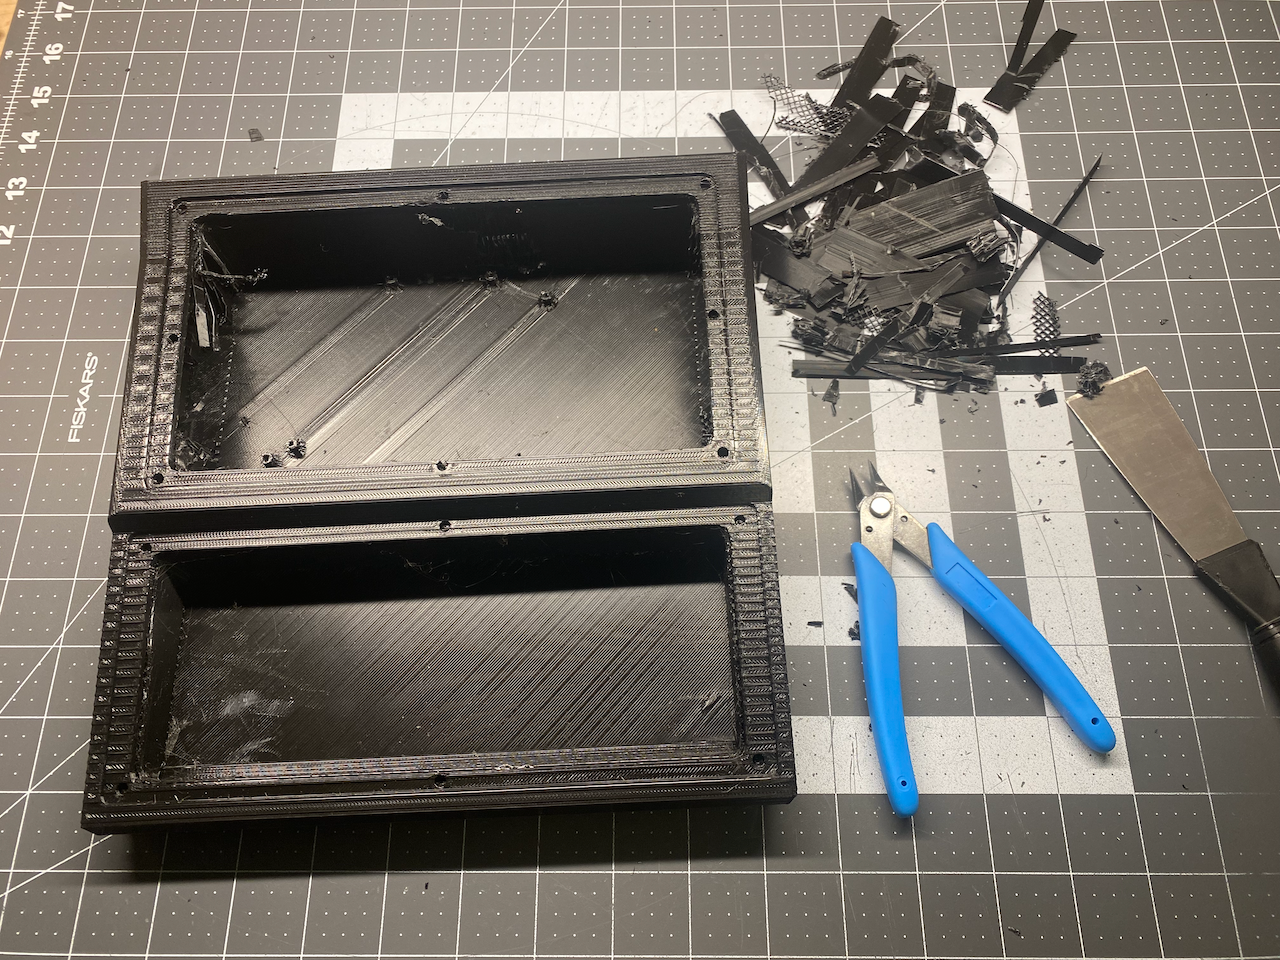
Once the support material was mostly removed, I realized that I should have adjusted the dimensions of the recessed area of the case that accepts the keyboard switch plate to take into account the thickness of the filament being extruded from the printer. This was a Noobie mistake and I should have known better, clearly too excited to get something printed. That meant that I would need to do some filing to open up that recessed area to fit. There were also some issues with the circuit board standoffs, I accidentally broke off two of them during the carnage of support material removal.
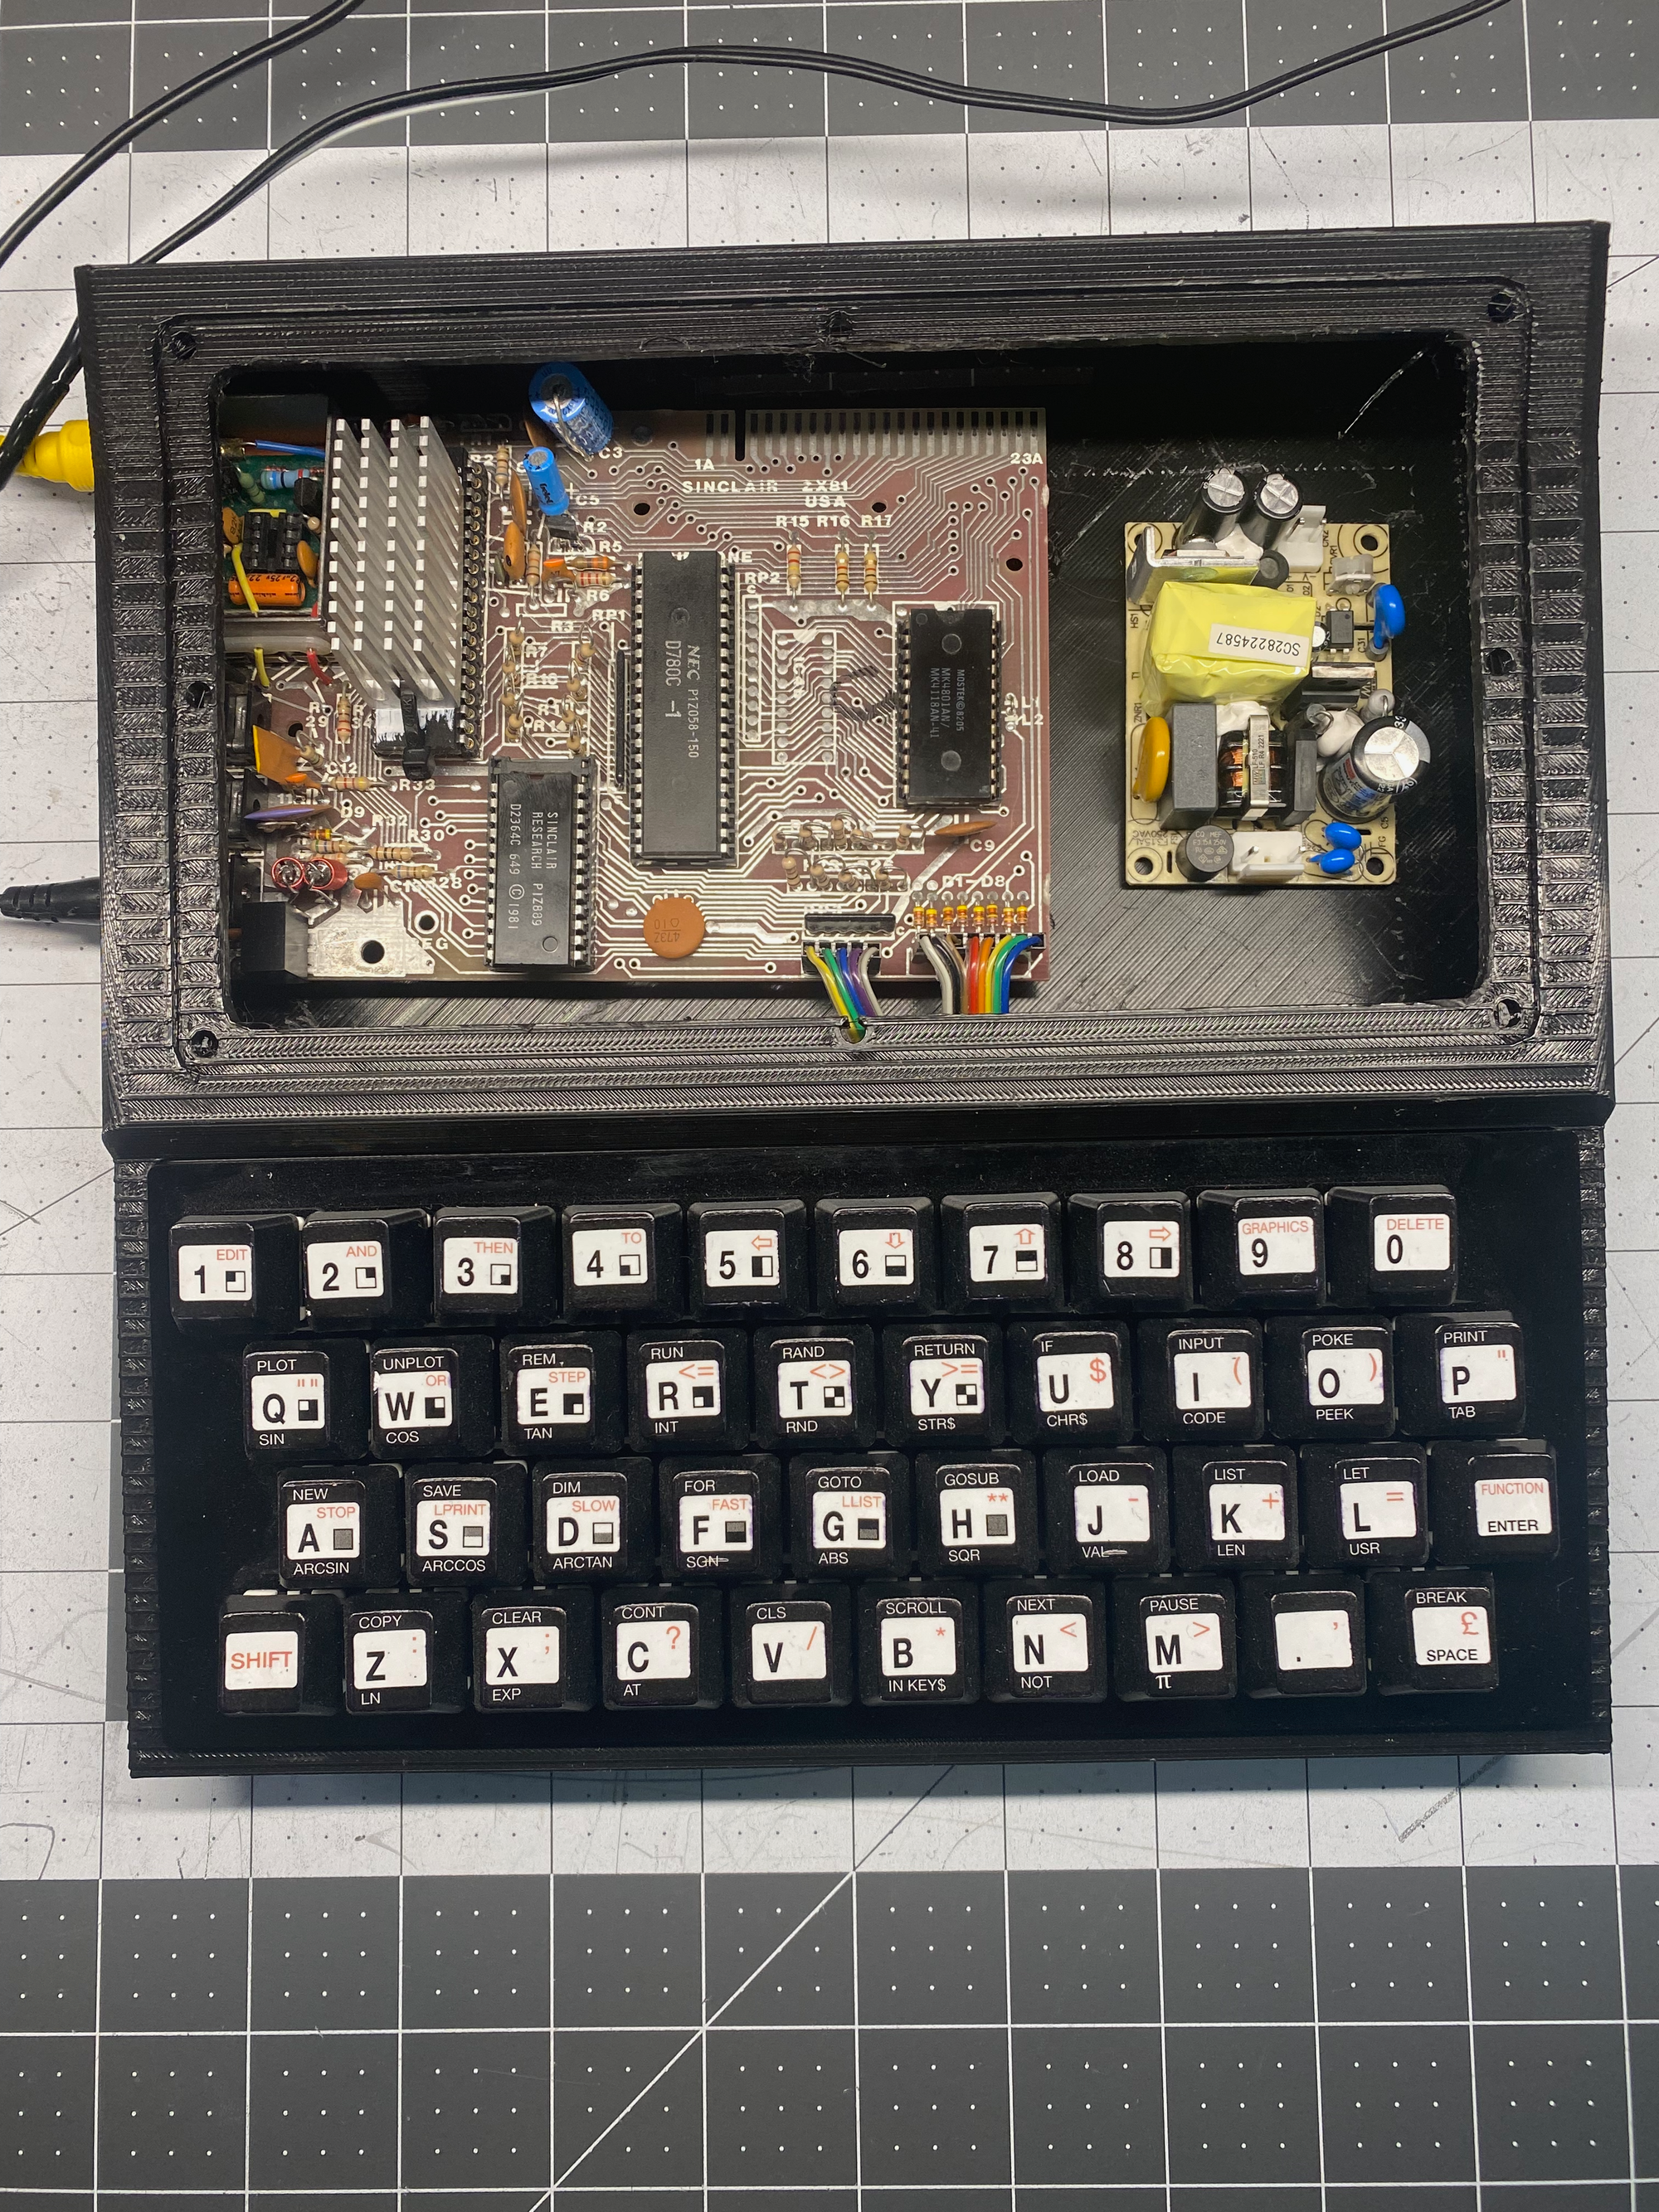
Lastly, there were some minor fit issues with the openings for the composite video jack, and the power jack. These things are to be expected, and my brother and I are already working on version 2.0 of the "Kilo-Zed". We also hope to take what we learned from this experience straight into the "Mega-Zed".